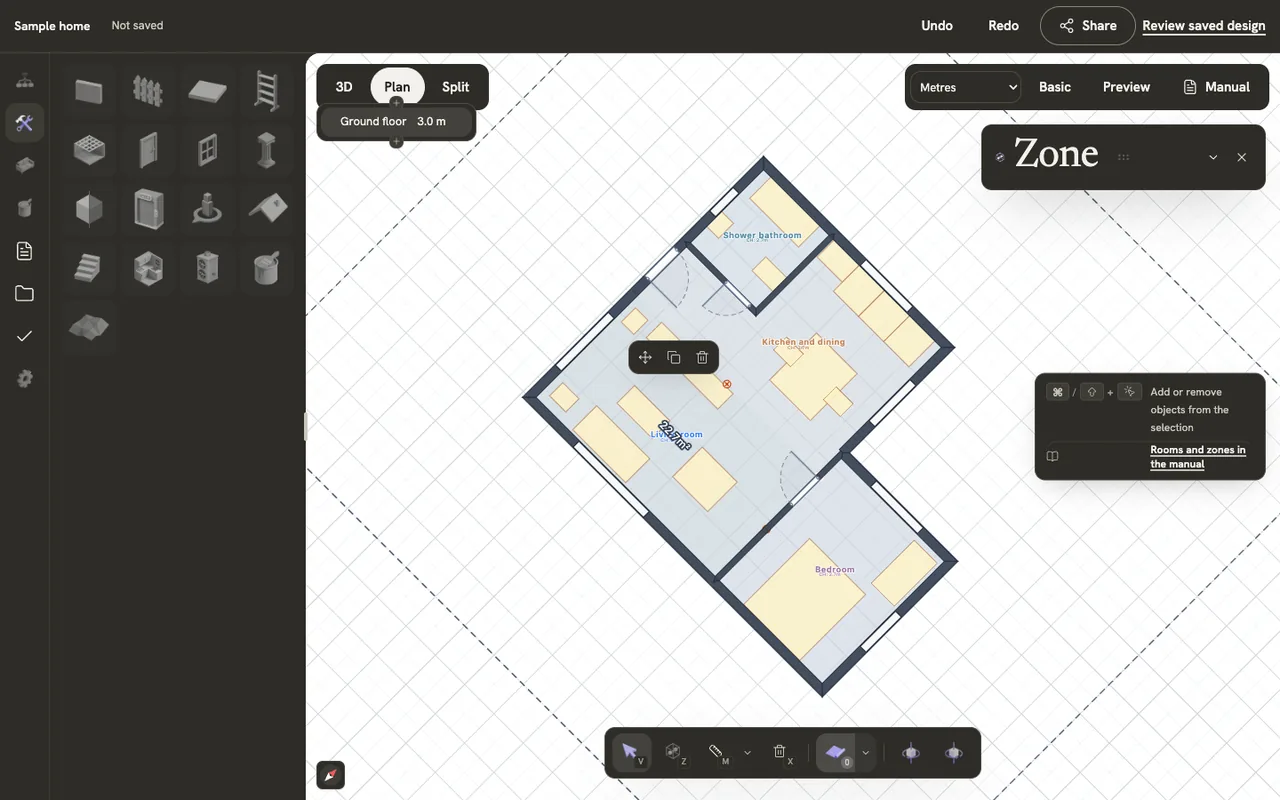
A zone marks out a room on the plan and gives it a name and a colour. It does not change the walls; it is the label layer that says this space is the kitchen, and it measures the space for you.
Draw a zone
- Press
Z, or choose Zone in the bottom toolbar. - Click each corner of the room.
- Click the first corner again, or double-click, to close the shape.
The new zone is named Zone 1, Zone 2 and so on, and stays selected so you can name it straight away. Esc leaves the zone tool and returns you to the walls.
Name it and colour it
In the Scene tab, double-click a zone’s name to rename it and press Enter to keep the name. The dot beside the name changes its colour.
Read its measurements
Select a zone to see its floor surface, wall surface and volume in the inspector. Where the editor cannot work a figure out from the geometry, it says Not proven rather than guessing. Room documentation holds the room name, room number and enclosure for drawings.
Reshape a zone
In the Plan view, select the zone and drag a corner to move it; the snapping chip in the key panel works here as it does for walls, and Esc puts the corner back.
Delete a zone
Select the zone and press Delete to remove the zone. The walls and furniture inside it stay where they are.