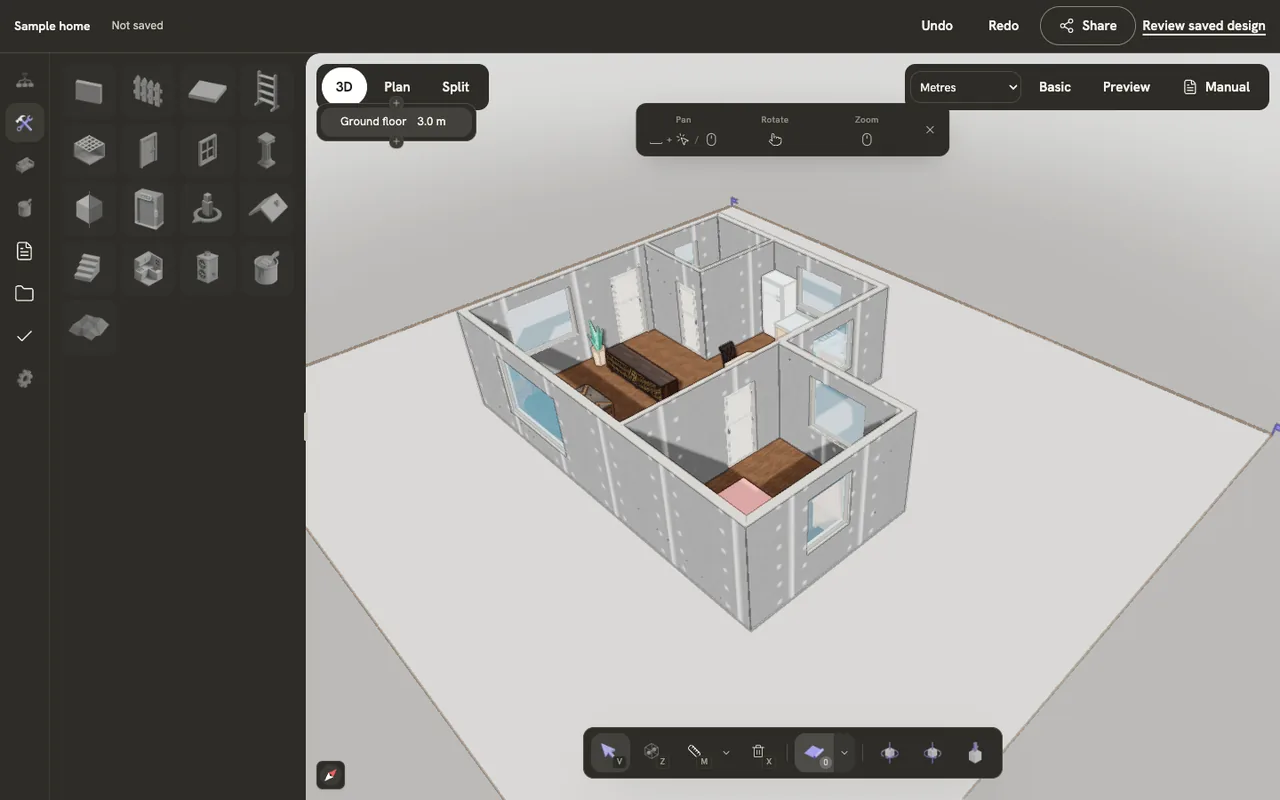
The editor fills the screen with the model. The tabs down the left edge open panels beside it, the toolbars sit above the model, and the tools you use most sit along the bottom.
The top bar
Across the top: the design option you are editing, with a menu to switch to another; whether your changes are saved; Undo and Redo; and Review saved design, which opens the last saved version in the viewer. On the sample home the bar says Not saved, and Share and Review ask you to create an account.
The side tabs
The tabs, from the top: Scene, Build, Items, Finishes, History, Assistant, Project, Checks and Settings. Choose a tab to open its panel; choose it again to close the panel and give the model more room.
The view toolbars
Above the model on the left: 3D, Plan and Split. On the right: the units (metres, or feet and inches), a switch between the Basic and Expert floor plan, Preview, and Manual, which opens this manual. The Expert floor plan adds Structural Grid to the Build tab.
The bottom toolbar
Along the bottom of the model: Select, Zone and Delete; quick tiles for the common drawing tools; the measuring tools; References, where guide images and scans live; and the camera buttons Orbit Left, Orbit Right and Top View.
The inspector and the key hints
Select anything and its settings open in the inspector: sizes, types, materials and the actions that apply to it. While a tool or a gesture is live, a small panel at the right edge of the view names the keys that apply right now, and links to the page of this manual that explains it.
The command palette
Cmd or Ctrl + K opens the command palette: type what you want and press Enter. A few settings live only here: how walls display (cutaway, up, down or see-through), how levels stack (stacked, exploded or one at a time), solid or rendered shading, and taking a screenshot.