The measuring tools draw distances, angles, areas, perimeters and volumes onto the model, and they stay in the home until you delete them. Smart measure reads the size of whatever you point at, and the Expert floor plan adds drafting dimensions.
Pick a measuring tool
The ruler button in the bottom toolbar starts the tool it shows; the arrow beside it opens the list: Smart, Distance, Angle, Area, Perimeter and Volume. Press M to start the last one you used from that list.
Choose the units in the toolbar above the model: metres, or feet and inches. Measurements print in the unit you choose.
Measure a distance or an area
- Click the first point.
- Click the next points. A distance needs two; an angle, an area or a perimeter takes as many as the shape needs.
- Press Enter to finish.
Backspacetakes back the last point, andEscfinishes and leaves the tool ready for the next measurement.
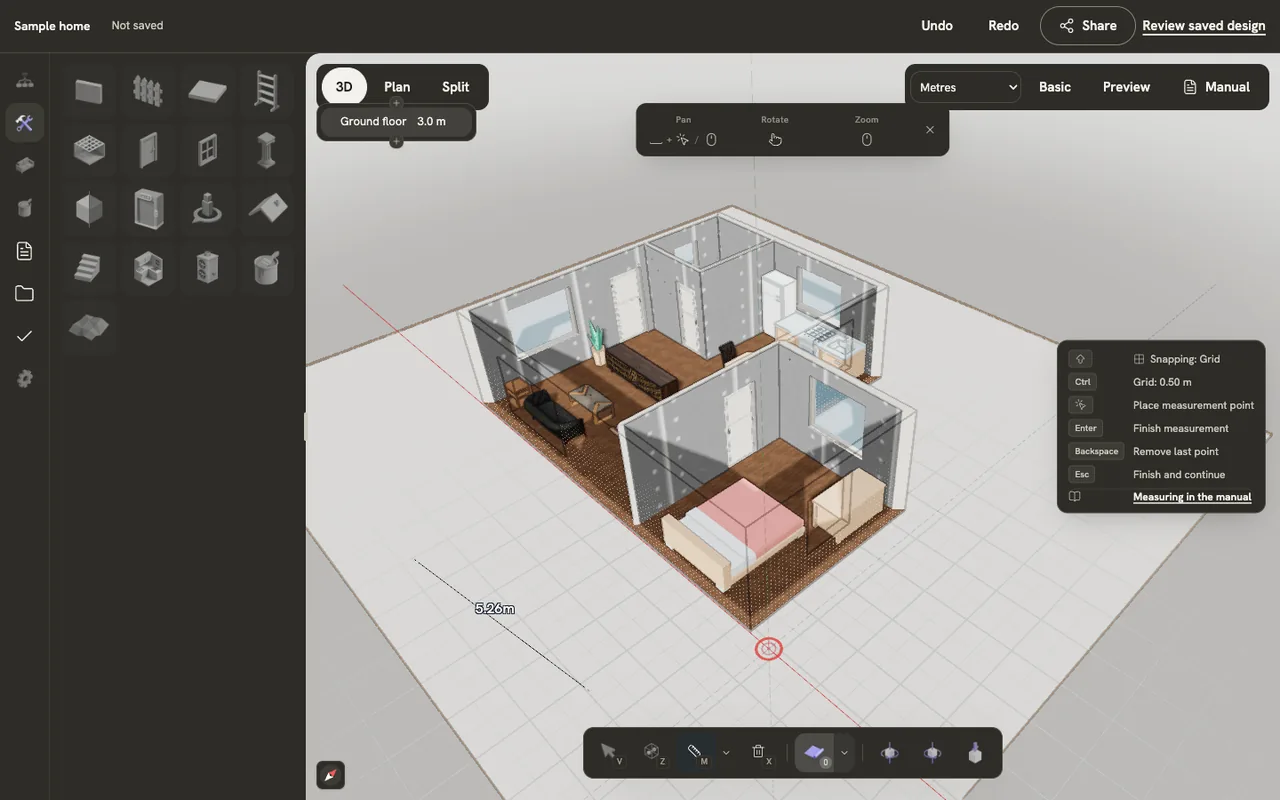
Points snap like any drawing tool: tap Shift to change the snapping and Ctrl to make the grid finer. See Keyboard shortcuts.
Smart measure
Choose Smart and move the cursor over a wall, a floor or a piece: it shows that surface’s dimensions as you hover. Click to pin the reading in place, and press Esc to leave smart measure.
Drafting dimensions
With the floor plan switch in the toolbar set to Expert, the measuring list adds drafting dimensions: Linear dimension, Continuous dimension, Radius dimension, Diameter dimension, Center mark, Chord dimension, Arc length, Angular dimension and Coordinate dimensions. Choosing one switches to Plan view, where they are drawn. In the Basic floor plan the editor asks you to switch to Expert first.
Change or remove a measurement
Measurements are objects like any other. Select one to see it in the inspector, and press Delete to remove it. Undo brings it back.