Pascal in INK TO BRICK: a new 3D floor plan editor
Preview the Pascal integration: edit building geometry, arrange furniture, apply finishes and review saved designs inside INK TO BRICK.
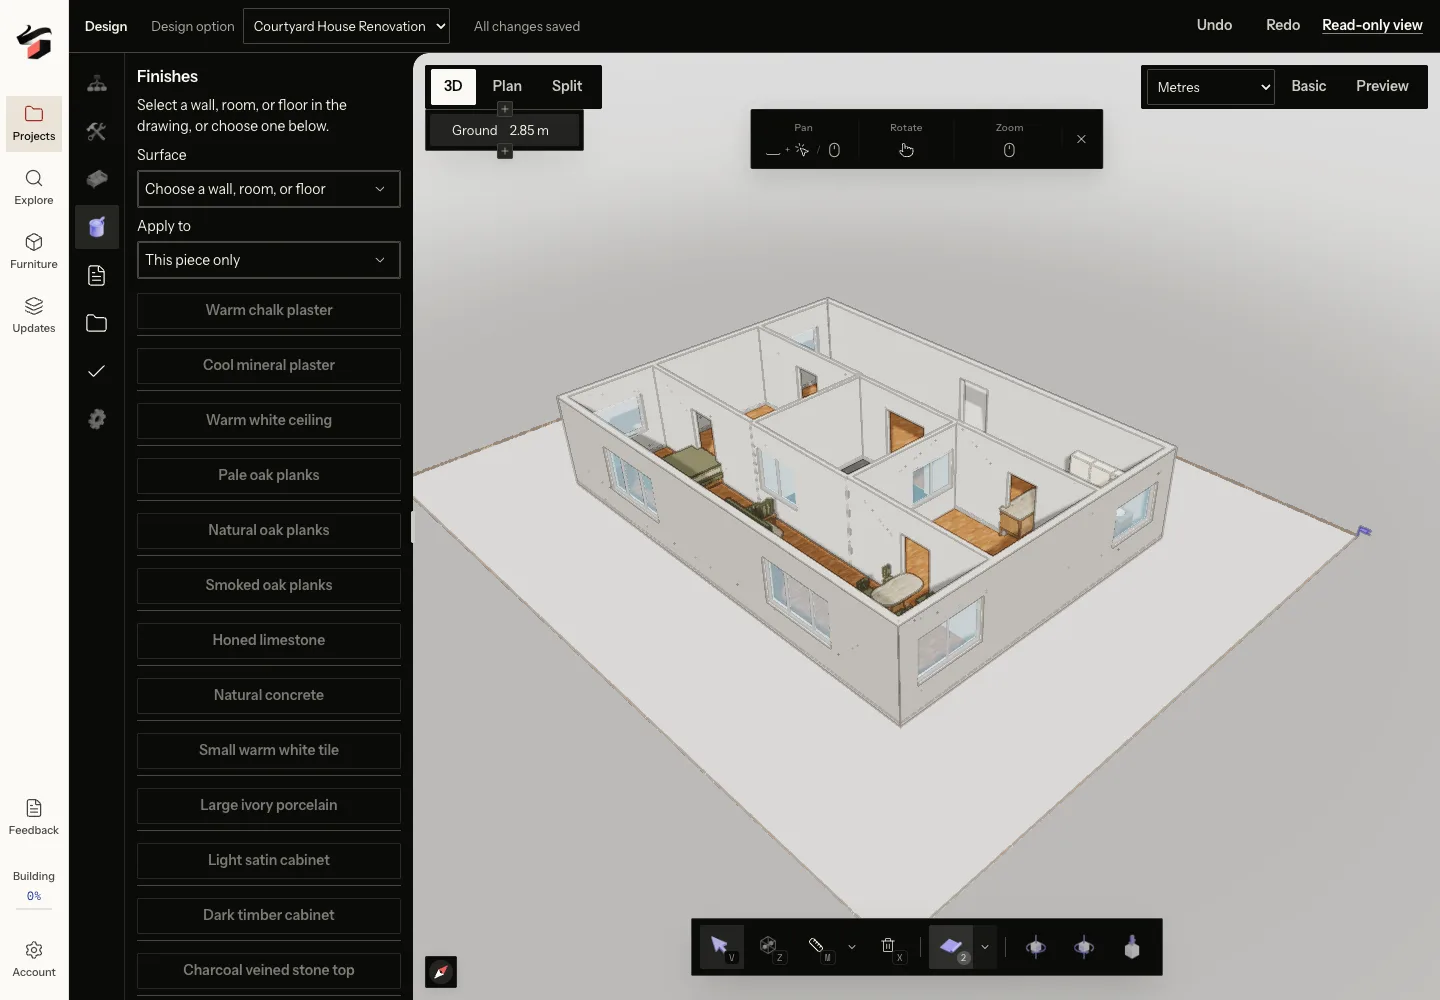
NoteIntegration preview · September 14, 2026. The Pascal integration is under review and has not been released to production. The screenshots show local test projects. Features and availability may change before release.
The Pascal integration brings building-model editing into the INK TO BRICK project workflow. The change is substantial: a reconstructed floor plan becomes a starting point for editing walls and openings, developing furniture and finish options, and reviewing the resulting space. Your source drawing, project access, saved revisions and exports remain part of the same project.
What Pascal adds to the project
Pascal provides the modeling workspace. INK TO BRICK connects that workspace to the uploaded source, design options, saved history, the product assistant and delivery formats. This matters when a design changes: you need to know which option you edited, whether it saved, and whether the view you sent shows that revision. A disconnected screenshot cannot answer those questions.
| Task | Preview capability |
|---|---|
| Understand the layout | Plan, 3D and Split views; model framing and camera controls. |
| Change the building model | Walls, rooms, levels, doors, windows, stairs, slabs, ceilings and roofs through the available modeling tools. |
| Develop an interior | Furniture placement, dimensions, finish selection and scoped material changes. |
| Review a proposal | Named placement findings, object selection, design options and revision comparison. |
| Ask for help | Model questions and proposed edits through the in-product assistant and authenticated MCP tools. |
| Deliver the design | Saved views, image capture and exports tied to the selected design revision. |
Move between Plan, 3D and Split views
Use Plan to examine room boundaries, door swings and the floor space around furniture. Switch to 3D to inspect height, openings and the relationship between surfaces. Split puts the plan and model beside each other, which is useful when you are learning a room or explaining an edit to someone else. They are views of the model; a photoreal image is a separate presentation output.
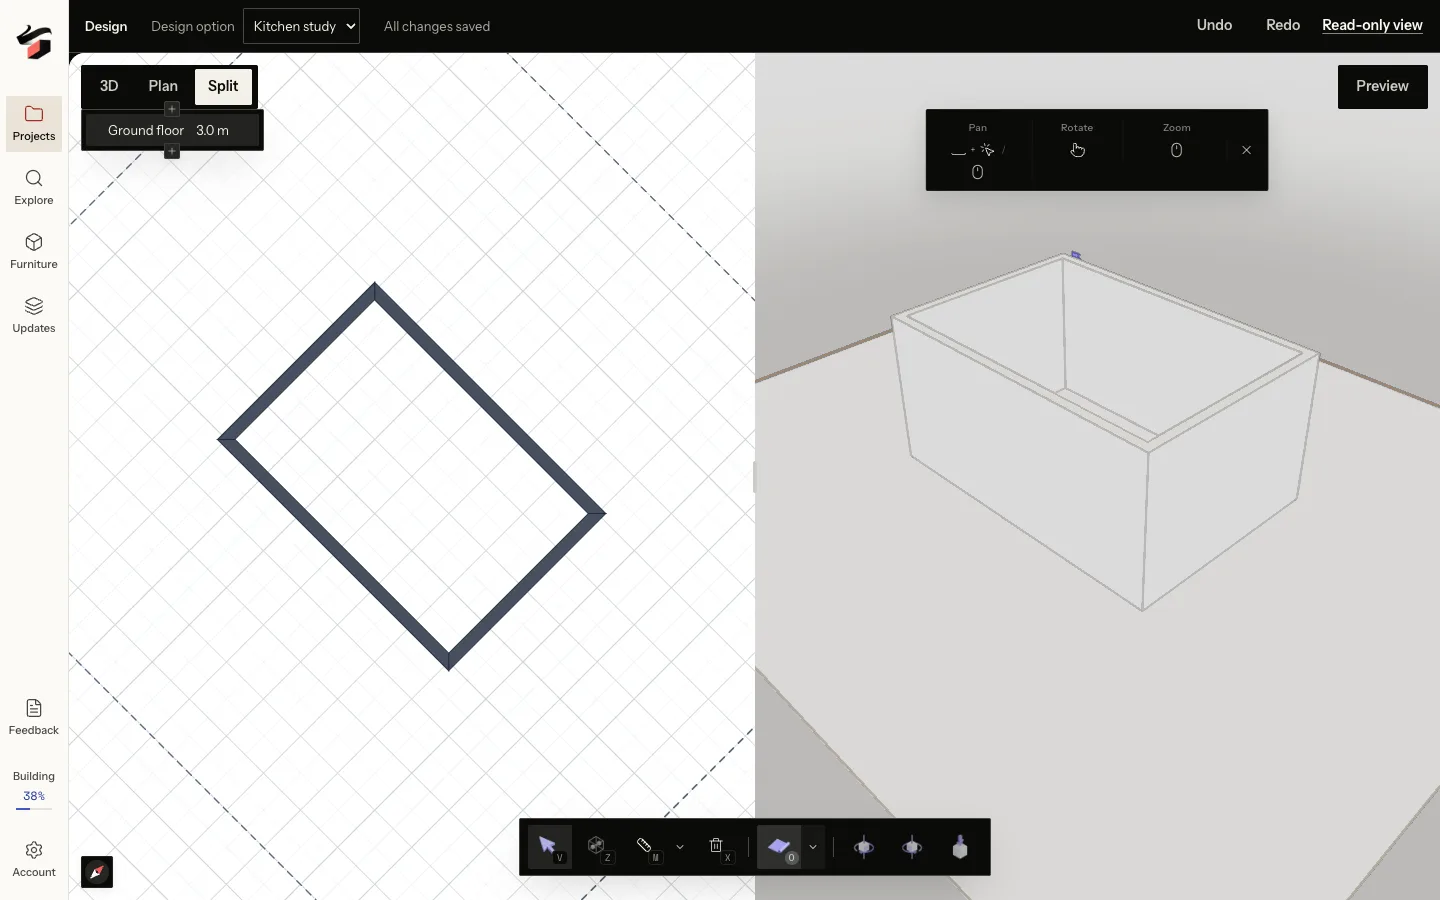
The integration also connects Source, Design and View navigation. Source provides the drawing context, Design is where you work on an option, and View presents the saved result. The selected option and revision need to follow that journey. Camera framing and wall visibility controls help expose an interior without changing the building geometry merely to see inside it.
Edit walls, openings and building elements
The native model supports architectural elements such as walls, levels, rooms, doors, windows, slabs, ceilings, stairs and roofs. These controls extend beyond the furniture and finish editing described in our earlier editor articles.
The broader Build palette includes kitchen cabinets, shelving, columns, fences and elevators, plus roof details and terrain tools. Its building-services group includes ducts, air registers, heating and cooling equipment, and drainage pipes. Availability depends on the capabilities enabled for the project. These elements help you represent a proposal; placing them does not produce an engineered services design.
For a reconstructed plan, first distinguish a modeling correction from a proposed renovation. Correcting a door that was read on the wrong wall should restore the drawing. Moving a doorway to create a new circulation route is a design option. Keep those purposes separate so a proposed condition does not quietly replace your record of the existing home. Our wall and opening workflow gives a worked sequence.
Place furniture and change finishes with a clear scope
Furniture entries carry dimensions and placement information. The integration connects selection and placement to fit checks, so you can move from a reported conflict to the object involved. A catalog sofa is still a stand-in: compare it with the outside dimensions of the sofa you intend to buy, including arms and any reclining position.
The Finishes panel supports targeted changes to model surfaces. Depending on the selected surface, a change can apply to the selection, a room’s walls, or interior or exterior wall groups. Floors require their own scope. The integration also expands the furniture and finish catalogs, with availability depending on the resources included at release. Start with a few representative finishes and inspect the boundaries before extending a change across the home.
Find a problem, select it and check again
A useful warning names the object and helps you reach it. The integration connects placement findings to model selection, so a reported furniture conflict can open the relevant design context with that item in focus. After a saved adjustment, checks can refresh against the edited model. Findings from an older revision are identified as historical instead of being treated as current defects.
Use these findings to investigate the modeled arrangement. They do not certify accessibility, building-code compliance or the physical condition of a property. An omitted radiator, an incorrect asset footprint or an uncertain plan scale can change the real result. The furniture clearance article explains how to combine reported checks with your own measurements.
Keep options, history and save state visible
Design options let you develop alternatives without losing the question each one answers. Revision history records saved changes within that work. Undo and redo help with the editing sequence; comparing saved revisions helps you understand a larger change. Before switching options or presenting a view, check the save state. A visible model can contain edits that have not reached the saved revision yet.
The integration handles unsaved work during navigation and carries the chosen revision into presentation and export flows. This supports a simple review habit: name the option, wait for it to save, open its view and check the result before sharing. Keep a baseline option when comparing two layouts, and use the same camera and furniture assumptions in both.
Use the assistant for questions and reviewed changes
The assistant can read native model information, describe objects and prepare supported edits. The MCP connection extends those workflows to an authorized external assistant. A proposed change is previewed before it is applied; permission and revision checks still apply. Asking what is in a room is different from authorizing a wall, furniture or material edit.
Try a bounded request such as “Show the objects involved in this clearance finding” before asking for a change. When you do request an edit, name the object, the intended value and what should stay fixed. Our AI floor plan editing and MCP guide follows that process from inspection to a saved result.
What to expect at release
The work under review covers editing permissions, read-only views, responsive panels, keyboard use, history and export connections. The surrounding product still controls project access and plan entitlements. This preview is not an announcement that every tool, catalog asset or format is available in every account. We will update this article when the integration is released and availability is confirmed.
Meanwhile, use the model review checklist on your existing projects. Checking the source, scale, room boundaries and furniture dimensions is useful with either editor, and it gives you a reliable baseline for the new workspace.