How to show a client a space you have not built yet
Conceptual model only. Not a survey or construction document.
Present a direction from a plan alone: review the locked model, compare saved arrangements, then send a GLB, a USDZ for Apple AR, or a presentation image.
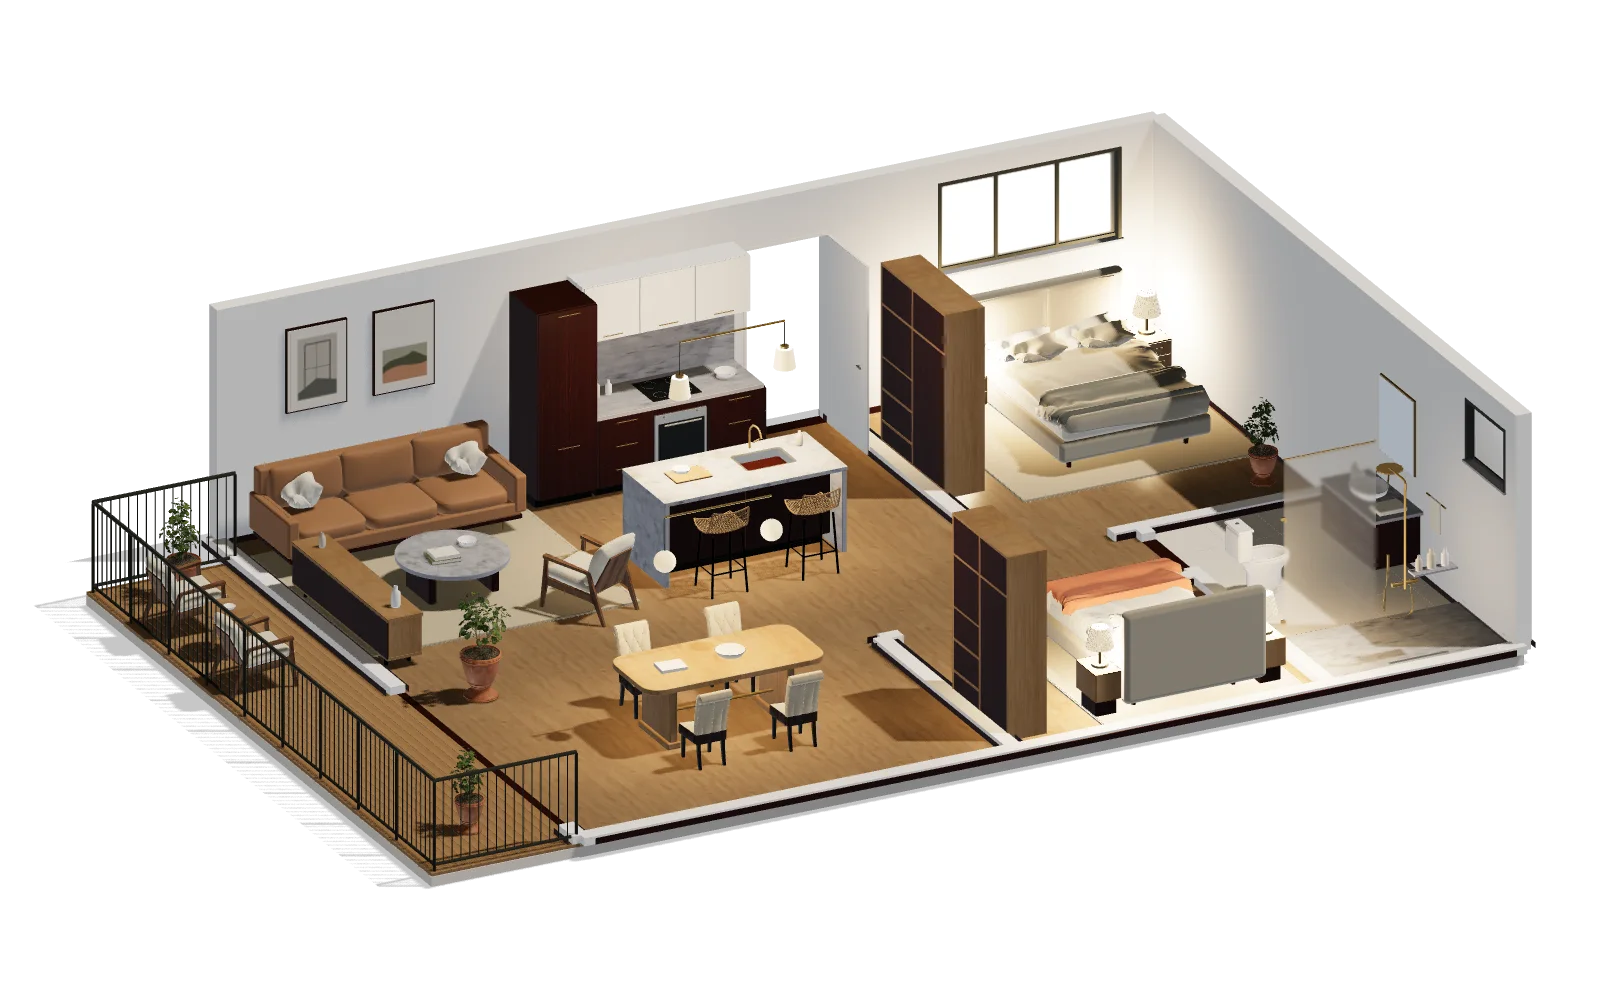
Turn the floor plan into a 3D model the client can move around in, agree the direction on that model, and only then take one image out of it. A plan asks a client to do arithmetic in their head; a model they can turn answers the same question without any. Nothing has been bought and nothing has been demolished, so the only document in the room is a floor plan: a developer’s brochure page, a landlord’s drawing, a PDF from the building’s management. No Triangle Studio’s 2026 rendering cost guide, published November 27, 2025, puts an interior rendering at to ,500 an image, so agree on the design and the camera view before you commission one.
What is a client actually asking?
A floor plan is drawn looking straight down, with no eye height and no view out. Reading one is a learned skill, and your client has not had to learn it. Try this before the meeting: point at a wall on the plan and ask how tall it is, then ask how far it is from the sofa to the window. The second answer is on the sheet, as two numbers to subtract. The first is usually not on the sheet at all. When a presentation goes quiet, it is one of four questions the drawing has not answered.
- Is it big enough? A dimension string answers that only for a reader who can turn two numbers into a body. A model you can orbit and pan answers it without arithmetic.
- Where does the light come from? A plan shows where the windows are. It does not show how the same room reads under warm evening light instead of an overcast sky.
- Will my things fit? That is a clearance question, not an area question. It needs a real footprint set against real walls, with the space left over drawn as space.
- What will it feel like? This is the question a still image answers best, and it is the one render studios are paid for.
Review the reconstructed model first
You upload the floor plan you already have, one file at a time, as a PDF, PNG, JPEG, SVG, or DXF of 25 MiB or smaller, and the conversion prepares a conceptual 3D model. For a single-floor upload, extract the required brochure sheet as its own one-page PDF before uploading; the PDF floor plan route covers that preparation and the drawing context used to interpret scale, including up to 30 reference measurements. Check the reported scale status and compare a second independent dimension before relying on distances. Before you change anything, review the existing conditions and lock them. Walls, openings and spaces come from the drawing and are not editable, so every later conversation is about finishes and furniture. To check a distance yourself, the measure tool takes two points and reports the length without changing the model. The editor’s Units control offers Metric or Feet and inches. For reference, 1 m is about 3 ft 3 in.
Saved directions, one model underneath
Furniture and finish studies stay separate from the reconstruction; they never change its walls or openings. New AI furnishing directions and their refinement are not currently available. If the project already has saved directions, review those; otherwise develop alternatives by placing furniture and assigning finishes manually in saved design options. Keep the arrangement you showed the client as its own saved revision. Revision history and side-by-side comparison are available on Creator, Project Pass, Studio, and Business. The furniture library lists each piece’s width, depth, height, and required clearances. Its footprint is labeled catalog bounds, not a product image: compare it with the actual product dimensions, then measure the remaining space against the checked model.
Worth checkingA design option changes fixtures, finishes and work scope. Walls, doors, windows, spaces and levels come from the locked existing conditions and cannot be moved in the app, so a client asking to widen an opening is asking for a survey workflow, not a finish change. Where an option shows a confidence figure, read it the way the product labels it: confidence describes the recommendation, not construction accuracy.
What you hand over
| Output | What it is | Where it goes |
|---|---|---|
| The locked model | The existing conditions from the drawing, with named spaces | The screen you present from, at the client’s pace |
| Design option | One direction: furniture placements and finish assignments, kept apart from the model | A before and after against the neutral model, side by side |
GLB or glTF | The 3D scene, exported on Plus and above | A viewer that opens those formats, or your own tools |
USDZ | The same scene packaged for AR, on Plus and above | AR Quick Look on a compatible iPhone or iPad; Android needs a separate GLB workflow |
| A presentation image | Default PNG, JPEG, or WebP exports at 1280 by 960 start on Plus. Custom views, sizes, lighting, and visibility require Creator, Project Pass, Studio, or Business. | A slide, an email, a document that opens anywhere |
| Public showcase page | A link anyone can open without signing in | The client, and anyone the client forwards it to |
Publishing a release, in the order the app asks for it
Review the project title, summary and saved release before sharing its public page. Free is for public projects; private work needs a paid plan, and the allowances are listed on pricing. The visitor experience is open without an account at the public showcase.
- Save the release draft, refresh the private preview, and look at it. That preview is what a reader will get.
- The uploaded source drawing, private generated-image gallery, collaborators, billing records and internal processing evidence are not part of the public project page.
- Publish the profile. Until you do, the project’s public page stays unavailable.
- Choose the URL name carefully. It is permanent, including while the profile is unpublished, and unpublishing later does not retract the page from the internet: cached copies and search results may outlive it.
Choose a view for the presentation
Members with editing access can generate a photoreal image from the current 3D view. The captured view, camera, scene and materials guide the image’s composition and layout. Compare the original and generated views in the private project gallery before using the result in a presentation.
Each gallery image stays linked to its captured source view and model revision. You can download the image, open the associated revision or download the exact source GLB. That connection keeps the client conversation attached to the model even when it starts with an image. Which file to send for which purpose is set out in the export format guide.
What to check before presenting
A generated image is a visualization, not a photograph of the completed space. Agree on that distinction with the client, and explain the difference between a render and a model. The lighting presets are three fixed presets, not a daylight study for your building’s orientation. Not every drawing resolves either: scale can come back unresolved, and a 3D file is not produced for every source. It is not a survey and not a construction document, and the model says so itself: Conceptual model only. Not a survey or construction document. The viewer provides a saved-revision GLB and room-map JSON. Before publication, the project creator or an assigned customer Editor with an available seat can use the 20-format export library, including DXF, DWG and SketchUp SKP on Creator and above and IFC and STEP on Business, when the plan includes access. Those files do not become a native Revit project, parametric authoring history or engineering validation. The published page carries approximate overall dimensions and a space count, plus approximate room measurements when the model includes measurable room geometry. Comments exist on published public projects only, so a private model is not a place to collect client feedback. And on a phone the editor changes finishes only: furniture and design options need a wider screen.
The image presents the direction, while the model helps the client examine how the rooms connect and where the furniture sits. Saved alternatives give the discussion something to compare, and the saved revision connects the chosen arrangement with the visualization made from it. Confirm workspace access and any image generation allowance before promising a client a date. The longer version of this workflow is on interior design proposals, and floor plan to 3D describes the conversion the whole thing starts with.
- Updated
- Byline
- INK TO BRICK
- Related guides
- Showing a client what you’re proposing
- The limit
- Conceptual model only. Not a survey or construction document.