From a hand-drawn sketch to a detailed floor plan
A notebook sketch drawn far from scale became an editable two-storey 3D model, sized by the numbers written on it rather than its lines. A conceptual model, built for planning.
On this page
A notebook sketch and the model it became
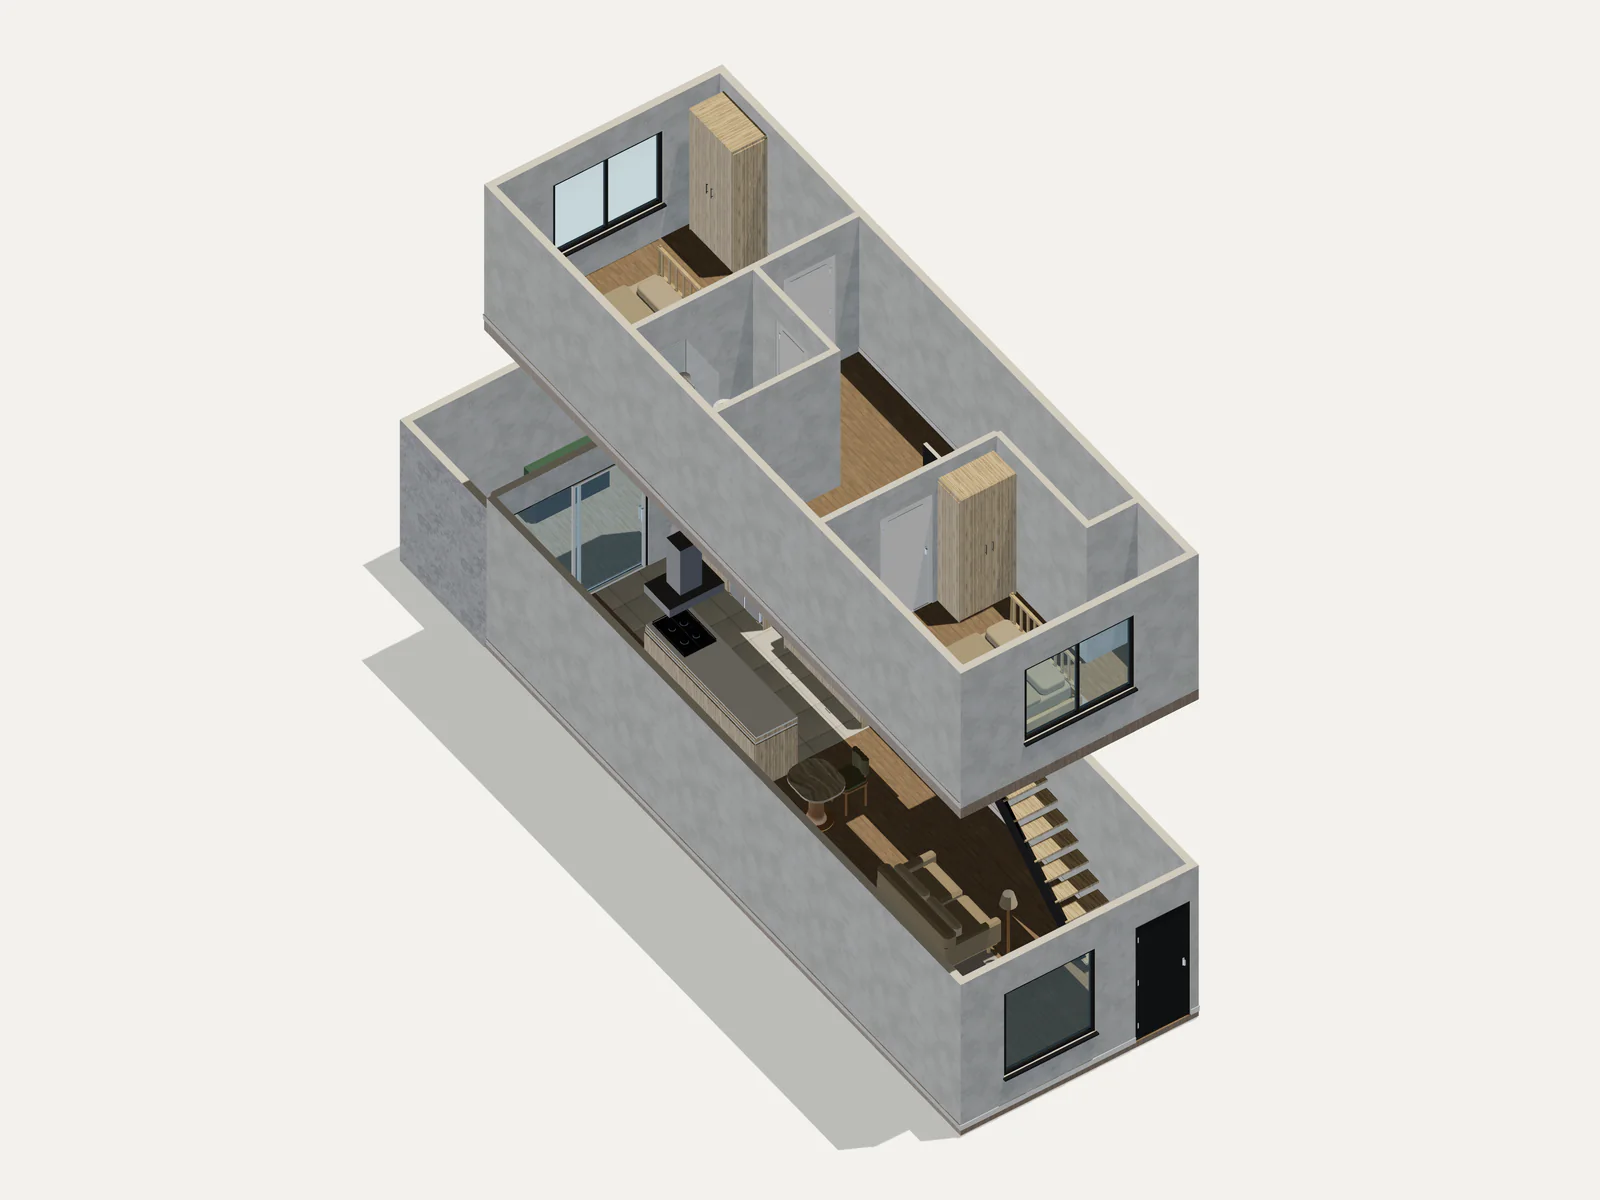
Open the 3D model (2.3 MB)
This is Casa René, a narrow home whose owner sent us two phone photos of one hand-drawn ground floor and four photos of the real rooms. The sketch became an editable two-storey 3D model: a living, dining and kitchen floor that keeps every measurement written on the page, and an upper floor that we inferred because nobody drew it.
A sketch is hard to measure. This one draws the house about 2.5 times too short for the numbers written on it, so its lines could not be trusted for size. The first automatic pass therefore sized the plan from the written measurements, not from the drawn walls, and the first model matched all eight of them, including the 11 m depth. It placed the kitchen as flat footprints at their measured sizes. A second, refinement pass by our team added cabinets, appliances, the stair, finishes and an inferred upper floor. This article walks through both passes, says which parts are measured and which are not, and ends with how to prepare your own drawing.
What we started with
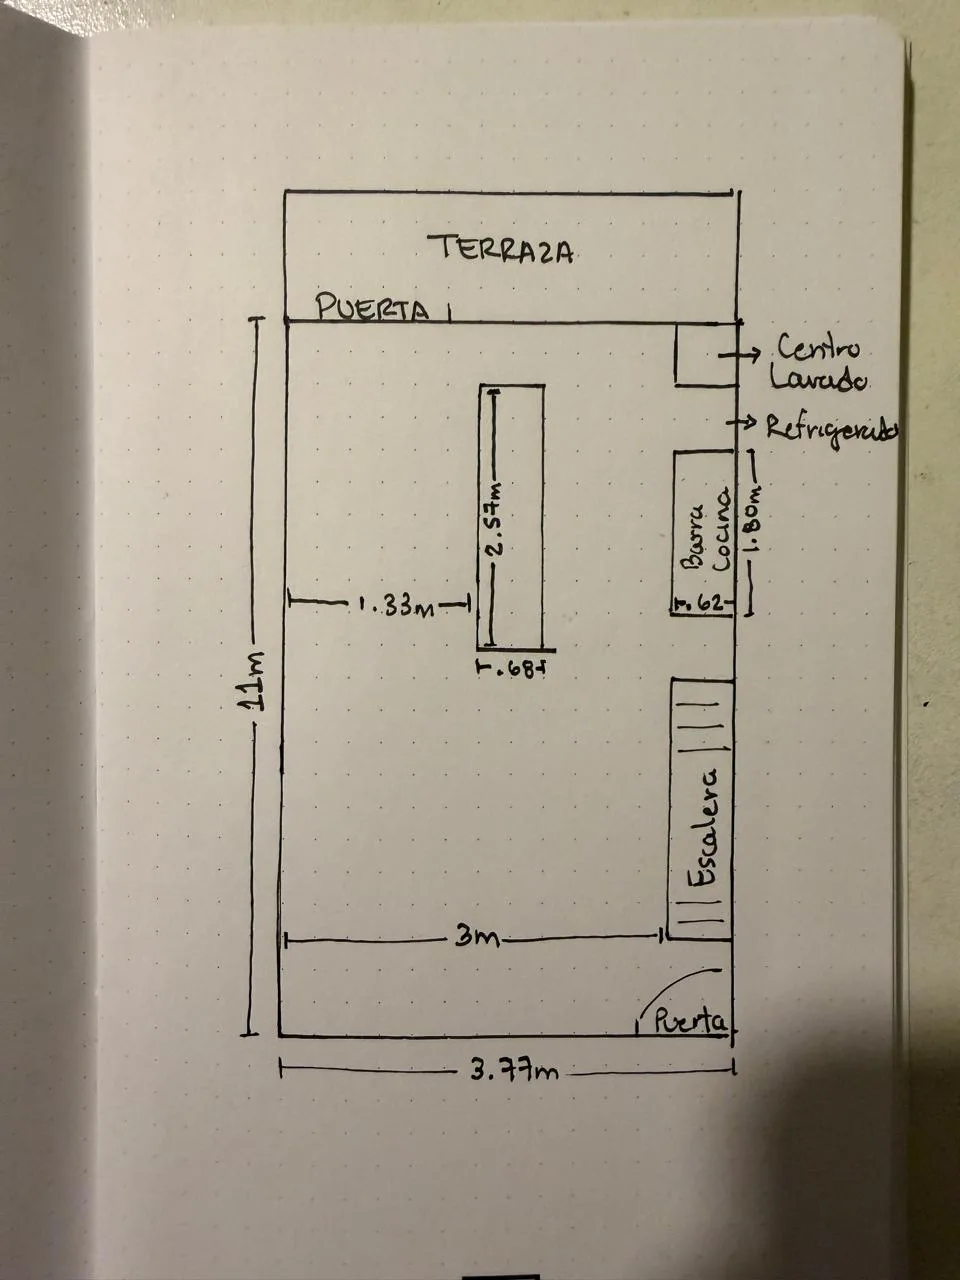
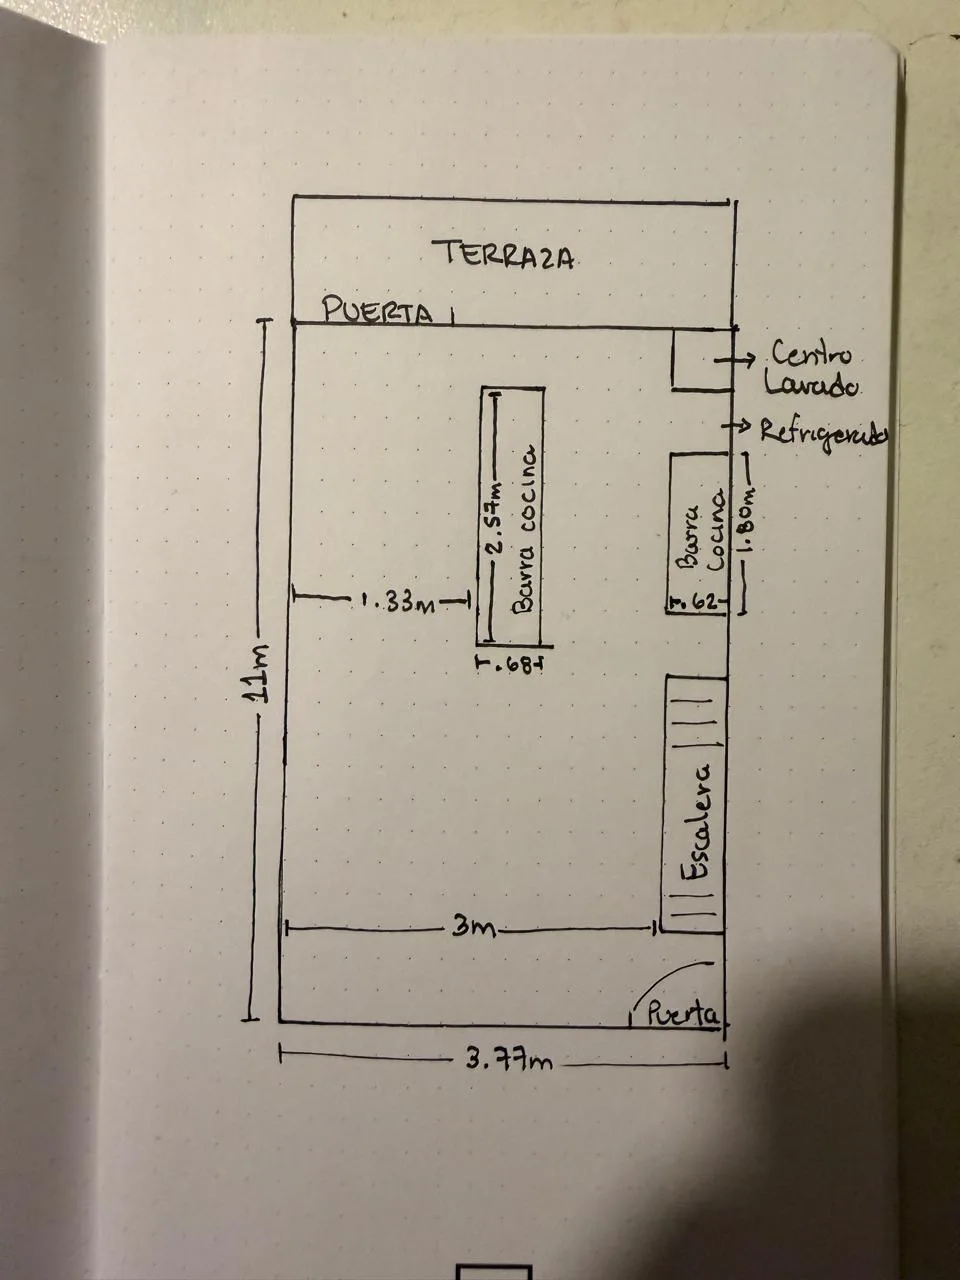
The sketch is drawn in pen on a dot-grid notebook page. It shows one floor: a long rectangle with a terrace at one end, a front door, a stair along one wall and a kitchen in the middle. The labels are handwritten in Spanish: “Terraza”, “Puerta”, “Barra cocina”, “Centro lavado”, “Refrigerador” and “Escalera”. Eight measurements are written beside the lines.
All eight values match the first model and the final model exactly. They are the only measured facts in this project, so they were treated as fixed: no refinement step was allowed to move them.
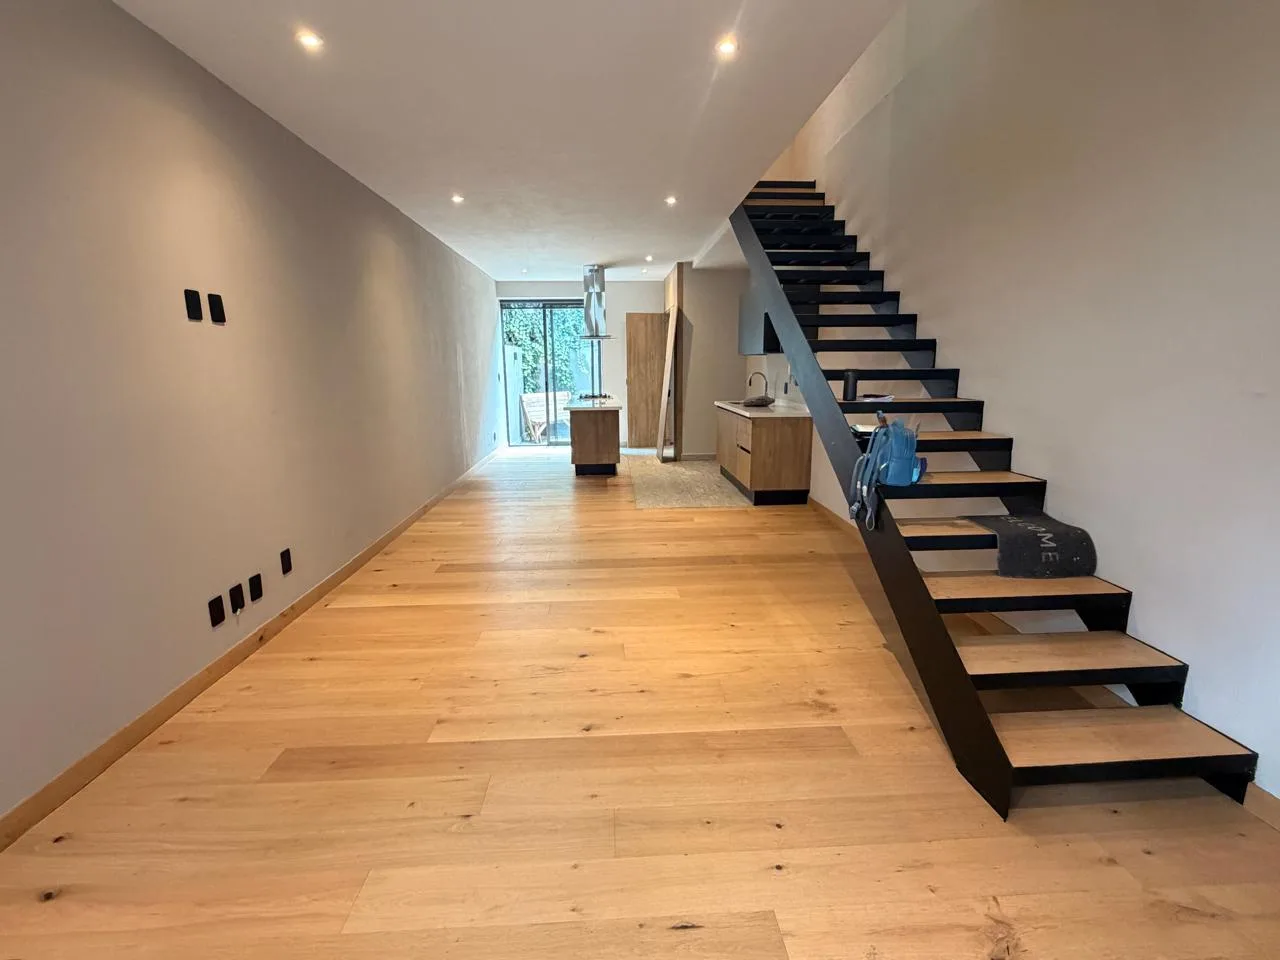
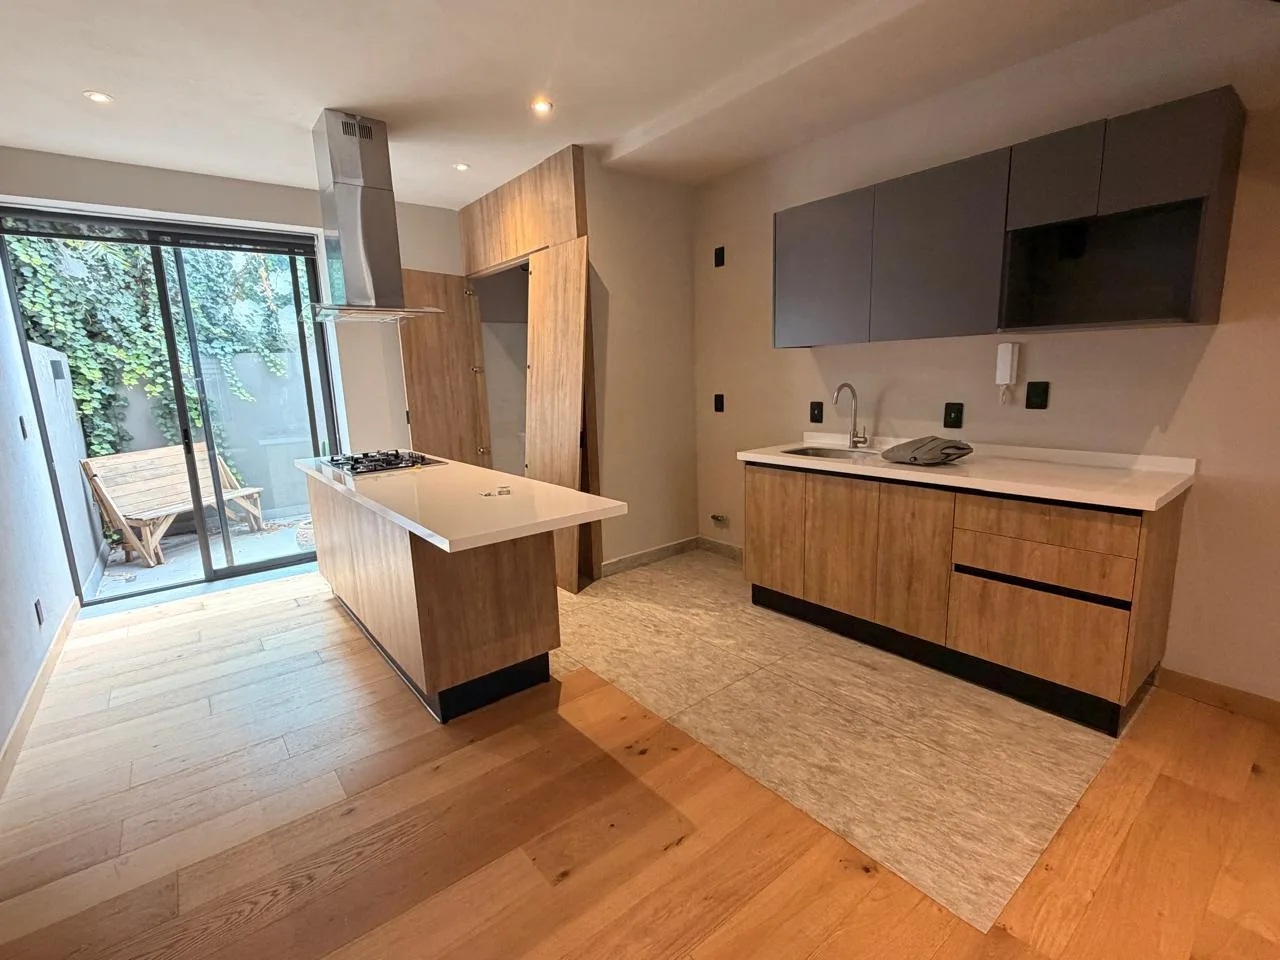
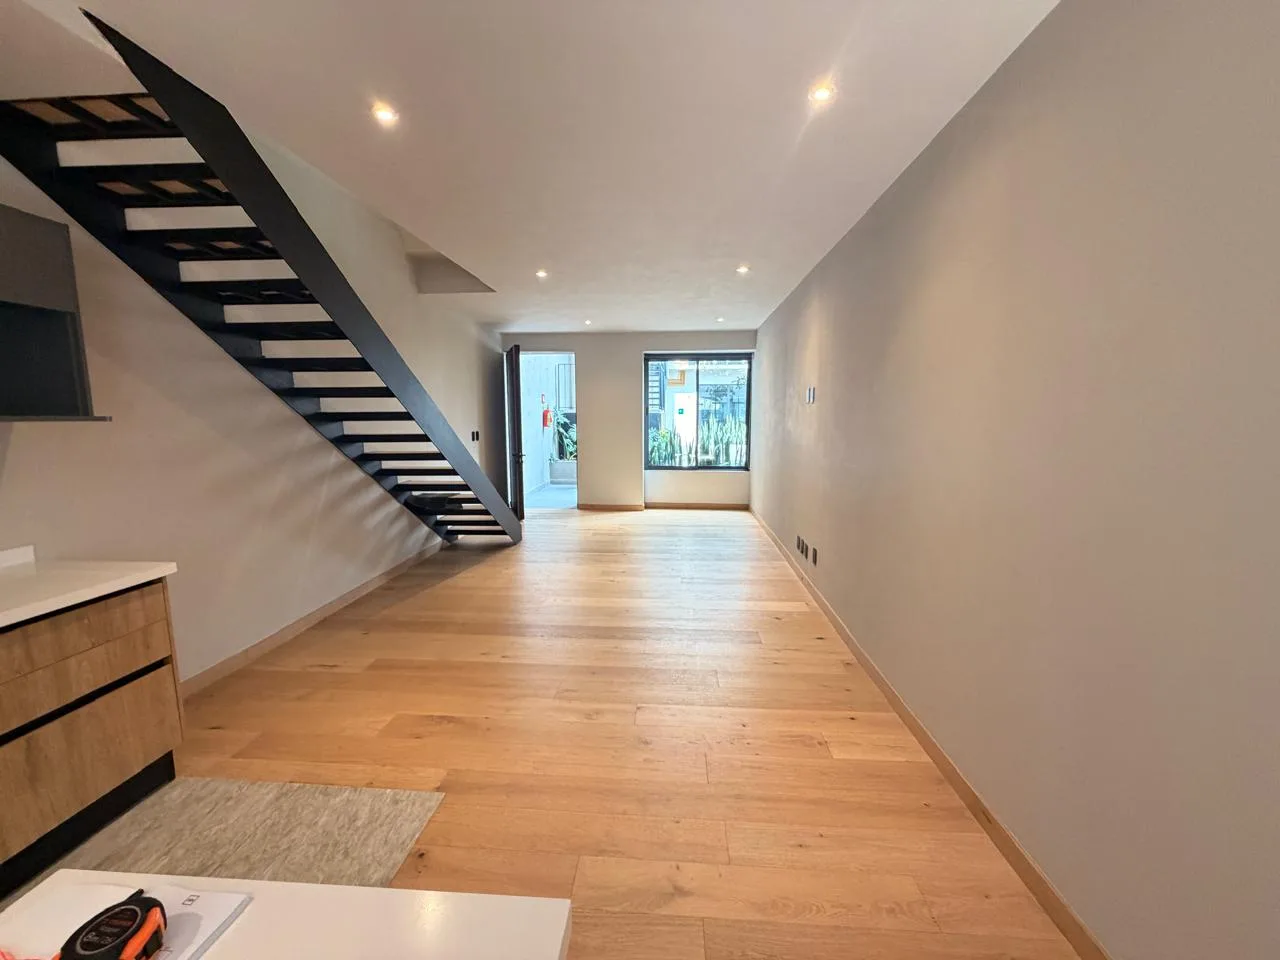
The owner also supplied four photos of the real ground floor. They show an open stair with black steel stringers and oak treads, a wide oak floor, a kitchen island with a cooktop and a hood, a wall counter with a sink, and a glazed door onto a planted terrace. Three of them are below.
What was not supplied
- An upper floor. The home has one, but there was no drawing or photo of it.
- Heights. Nothing on the sketch gives a ceiling height, a wall height or a stair rise.
- Wall thickness, terrace depth and the size of each door and window.
Normalizing the drawing
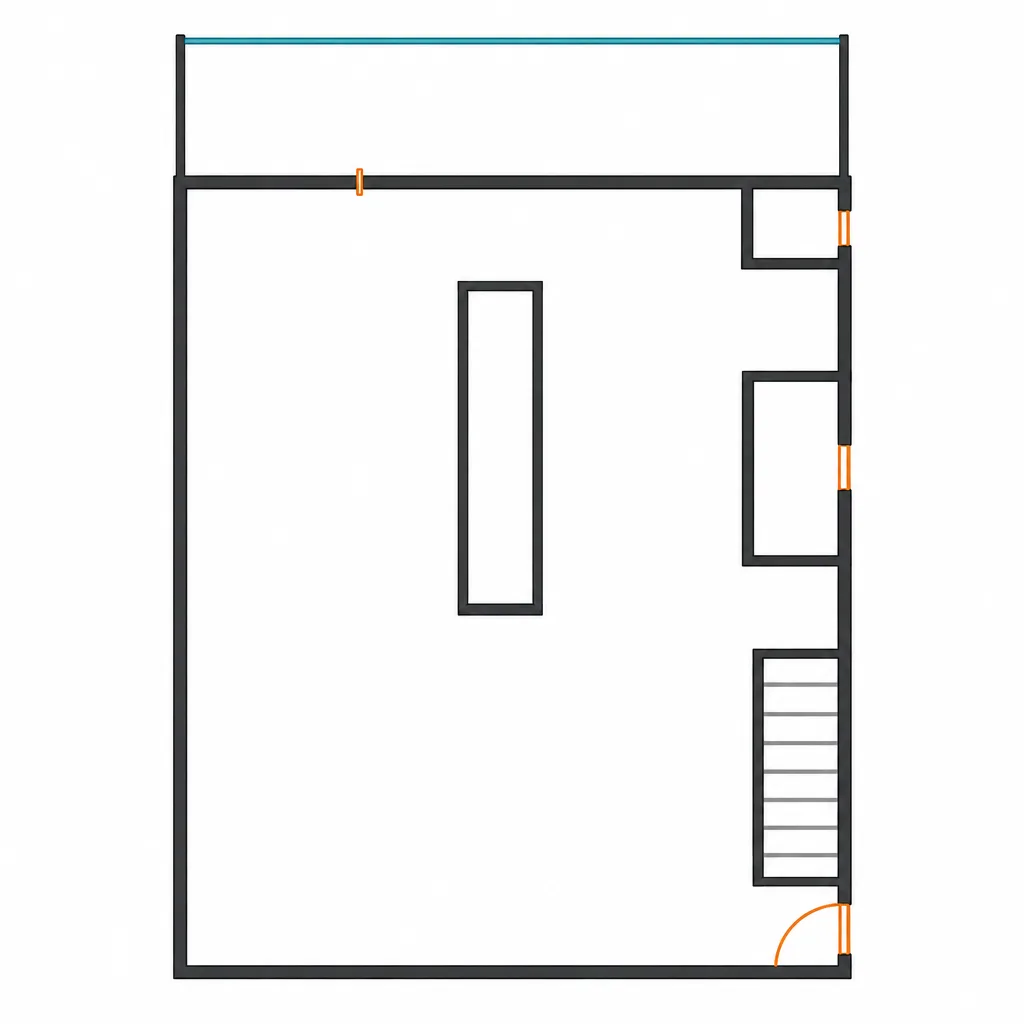
A phone photo of a notebook page is harder to read than a drafted plan. The grid dots look like marks, and labels and dimension lines sit right beside the walls they describe. So the first step turns the photo into a clean drawing. Comparing the two images, these are the changes you can see:
- The angled photo becomes a square-on drawing, so walls that should be parallel are parallel.
- The dot grid, the handwriting and the dimension lines are removed.
- Walls become uniform strokes of the same weight.
- Openings are marked in orange.
- The terrace edge is drawn as glazing, in blue.
- The arrows pointing to “Centro lavado” and “Refrigerador” turned into two orange marks on the exterior wall, as if they were openings.
That last change is worth noticing. The normalized drawing is cleaner, but it is also an interpretation, and an arrow pointing at an appliance is easy to mistake for a window. Removing the dimension lines did not remove the measurements: the eight values were kept and carried into the model.
Why the drawing cannot be measured
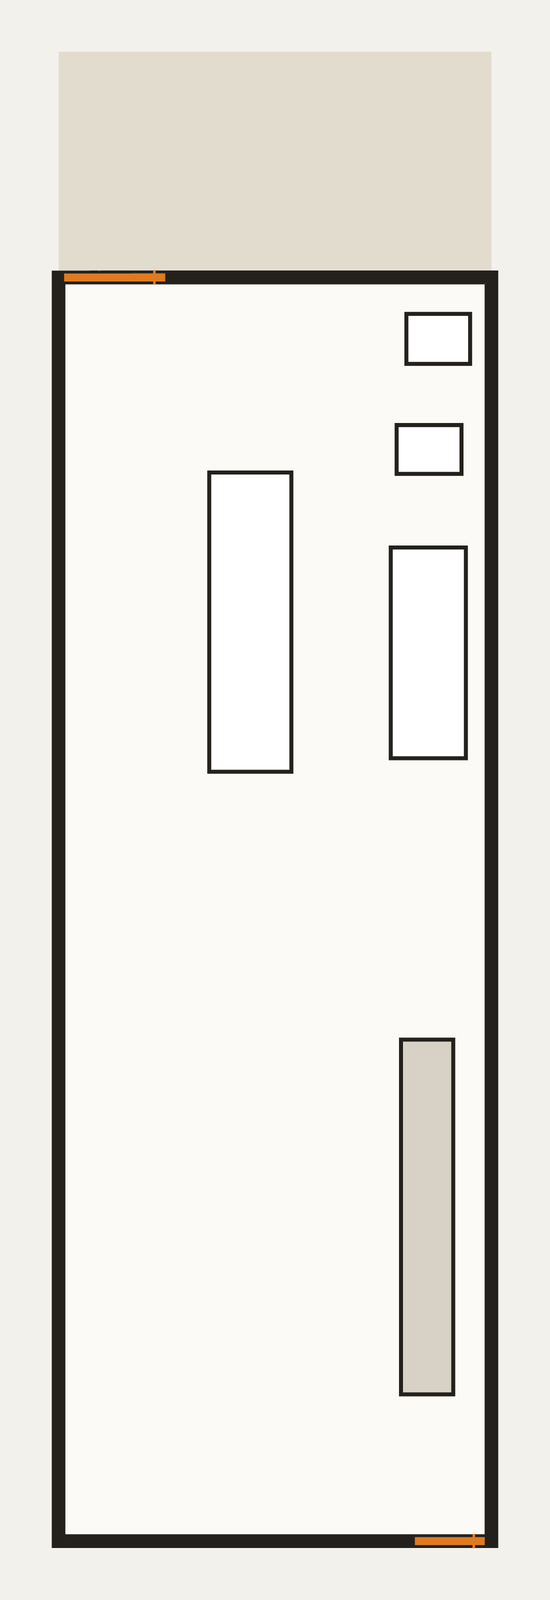
Normalizing cleans the drawing, but it keeps the proportions the drawing has, and here those are not the house’s. In the sketch, and in the normalized drawing, the interior is drawn about 665 px wide and 789 px deep: a depth about 1.2 times the width. The numbers written on the page say 3.77 m wide and 11 m deep: a depth about 2.9 times the width. At the scale of its own width, the drawing shows a house about 4.5 m deep. It is drawn about 2.5 times too short for its own numbers. The owner also notes that the 3 m span beside the stair is not drawn to scale.
This is normal. People sketch to show what goes where, and a long, narrow house rarely fits a notebook page at its true shape. A dot grid does not make a sketch a scale drawing, so measuring its lines would have produced a house less than half as deep as the real one.
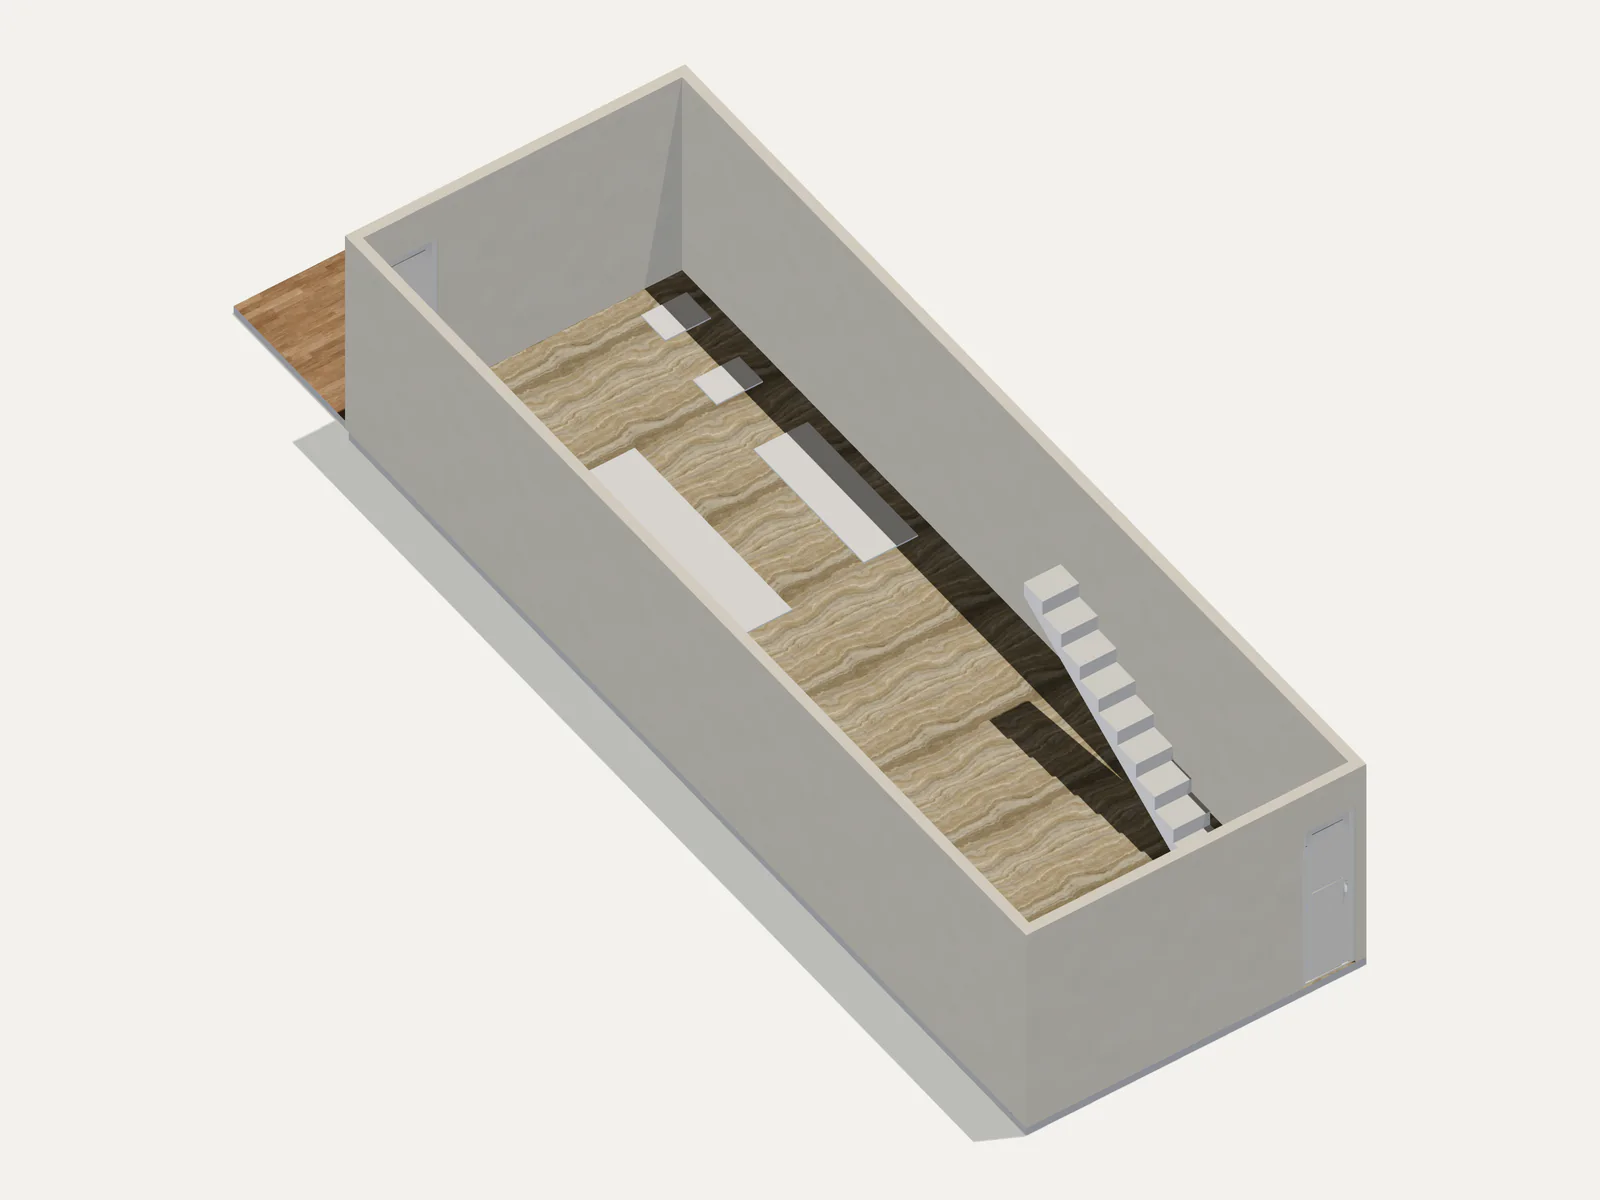
So the reconstruction read the drawing and the numbers for different things. The drawing gave the layout: which wall the stair runs along, where the island sits, where the doors are. The written measurements gave the size, and the traced plan was fitted to them rather than to the drawn walls. The last image above is a top view of the first model, drawn at the same height as the sketch: 3.77 × 11 m, the shape the numbers describe.
What a furnished 2D reference is
Some projects also get a furnished 2D reference: an AI-generated picture of the plan with furniture drawn in, made to help you picture how the rooms might be used. It is an image for orientation. It is not the plan view of your editable model, and it cannot be edited or measured.
No furnished 2D reference was generated for Casa René, so none appears here. If you want to see what one looks like, the floor plan to 2D page shows an example made from one of our own plans.
The first reconstruction
Open the 3D model (347 KB)
Open the 3D model (2.3 MB)
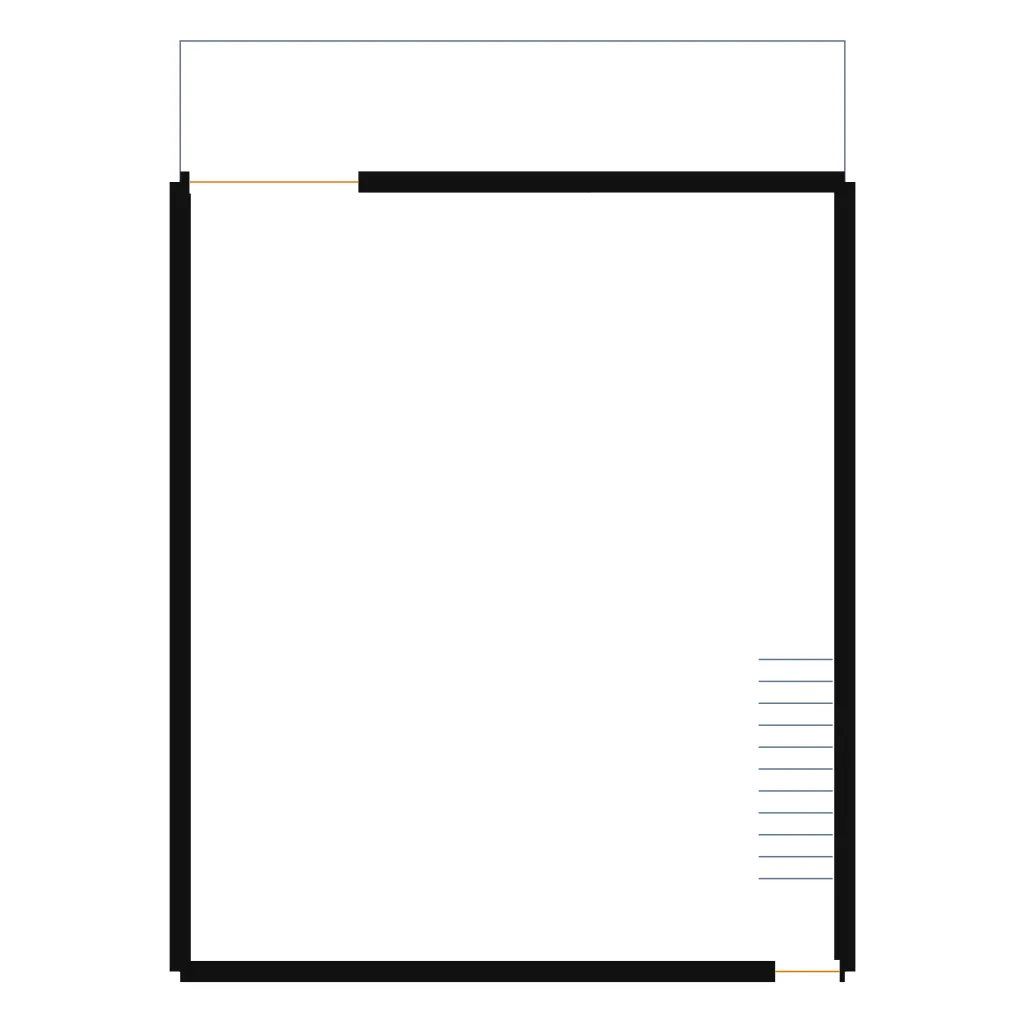
The first automatic pass read the walls, the openings, the terrace and the stair from the normalized drawing. It then built a 3D model with the traced plan fitted to the written measurements, which we call measurement-led interpretation. The first model already matched all eight written measurements, including the 11 m depth that the drawing shows at less than half that.
The redraw in the first image shows only walls, openings, the terrace and the stair treads because it draws structure, not fixtures. The model itself went further. It placed the island, the wall counter, the washing-centre box and the fridge as flat white footprints at their measured sizes and positions; the island footprint is 2.57 × 0.68 m, as written. Here is what the first model did not have:
- No cabinets or appliances. The kitchen was footprints only, with no cooktop, sink or hood.
- The stair was a plain white block of steps, with no steel, oak or railing.
- The floor was plain, with no finish taken from the photos.
- There was no front window.
- There was no upper floor.
None of this is unusual for a hand sketch. A sketch carries no cabinet or finish detail, and nothing reading a drawing can know a second floor exists if nobody drew it. The size and the layout were right, which is what made a refinement pass worth doing.
Refinement, step by step
The refinement was not a single button. Both sketch photos and the four reference photos went back through AI modeling, and the result was then furnished from the catalog, given finishes from the photos, aligned between levels and corrected at the stair. The eight written measurements stayed fixed throughout. Each row below pairs what the first model had with what replaced it.
The result
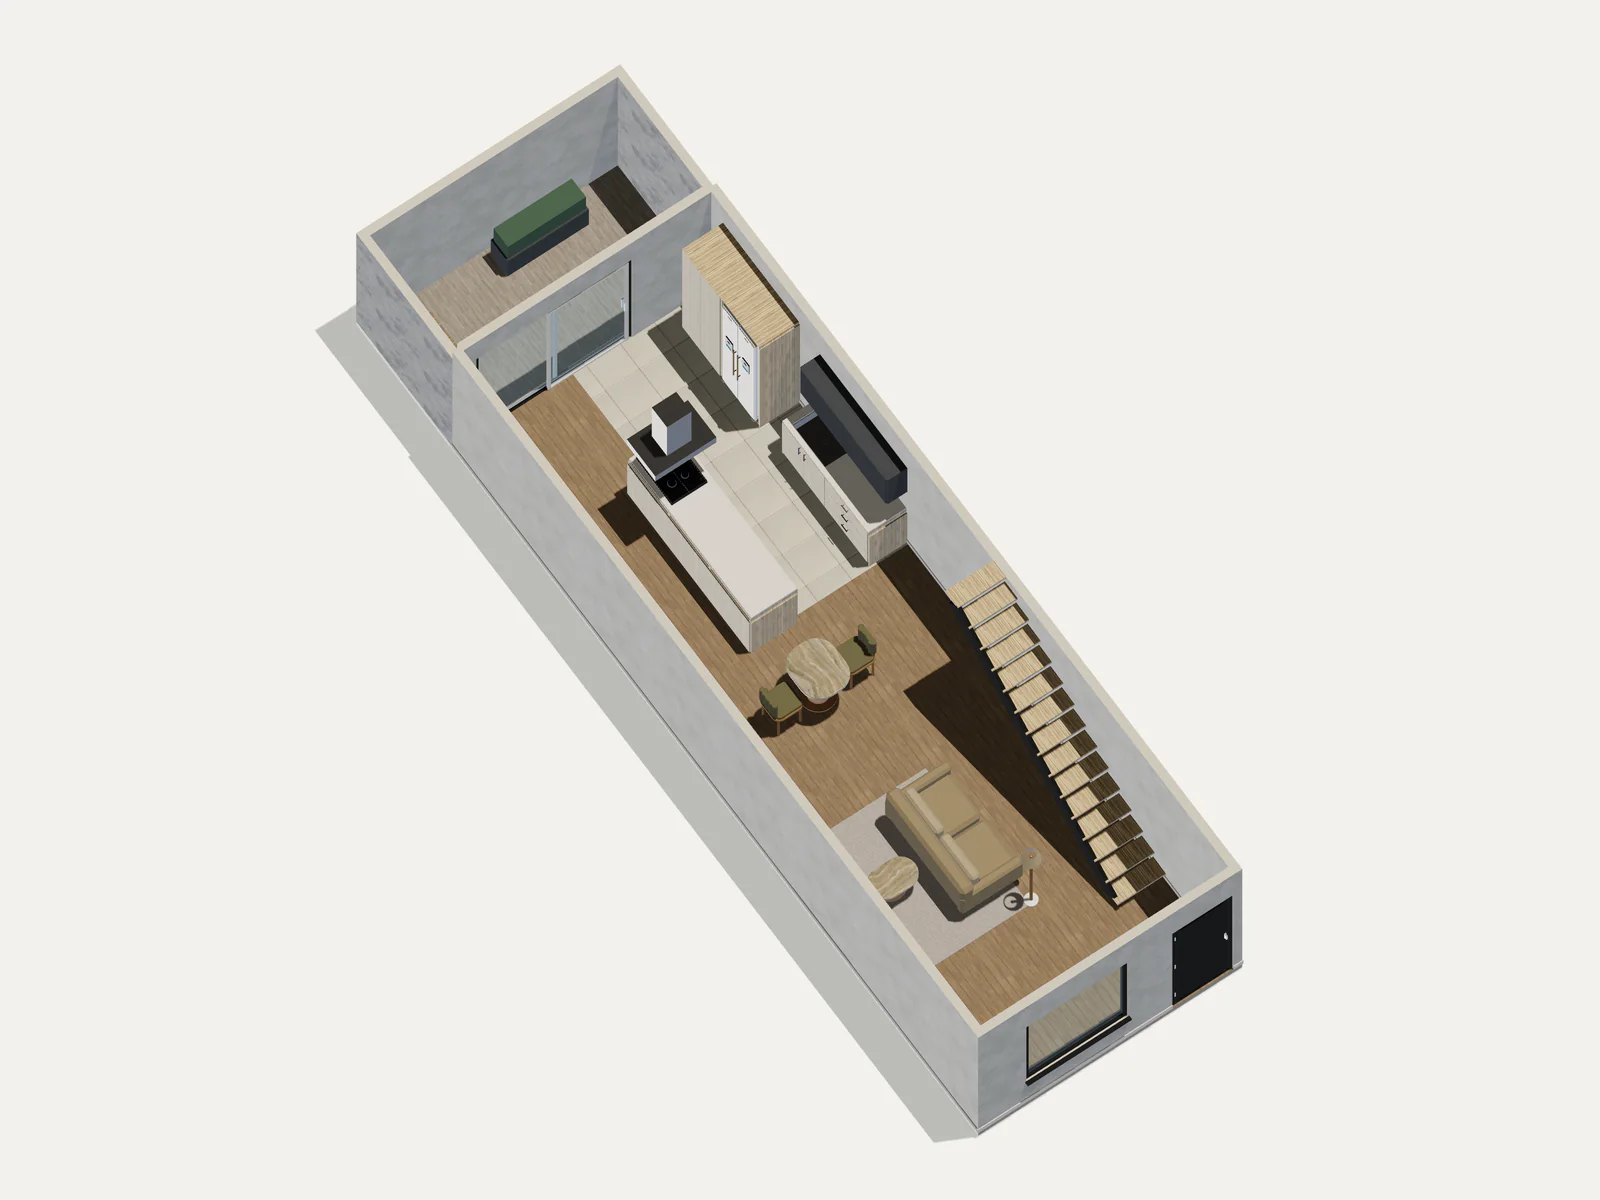
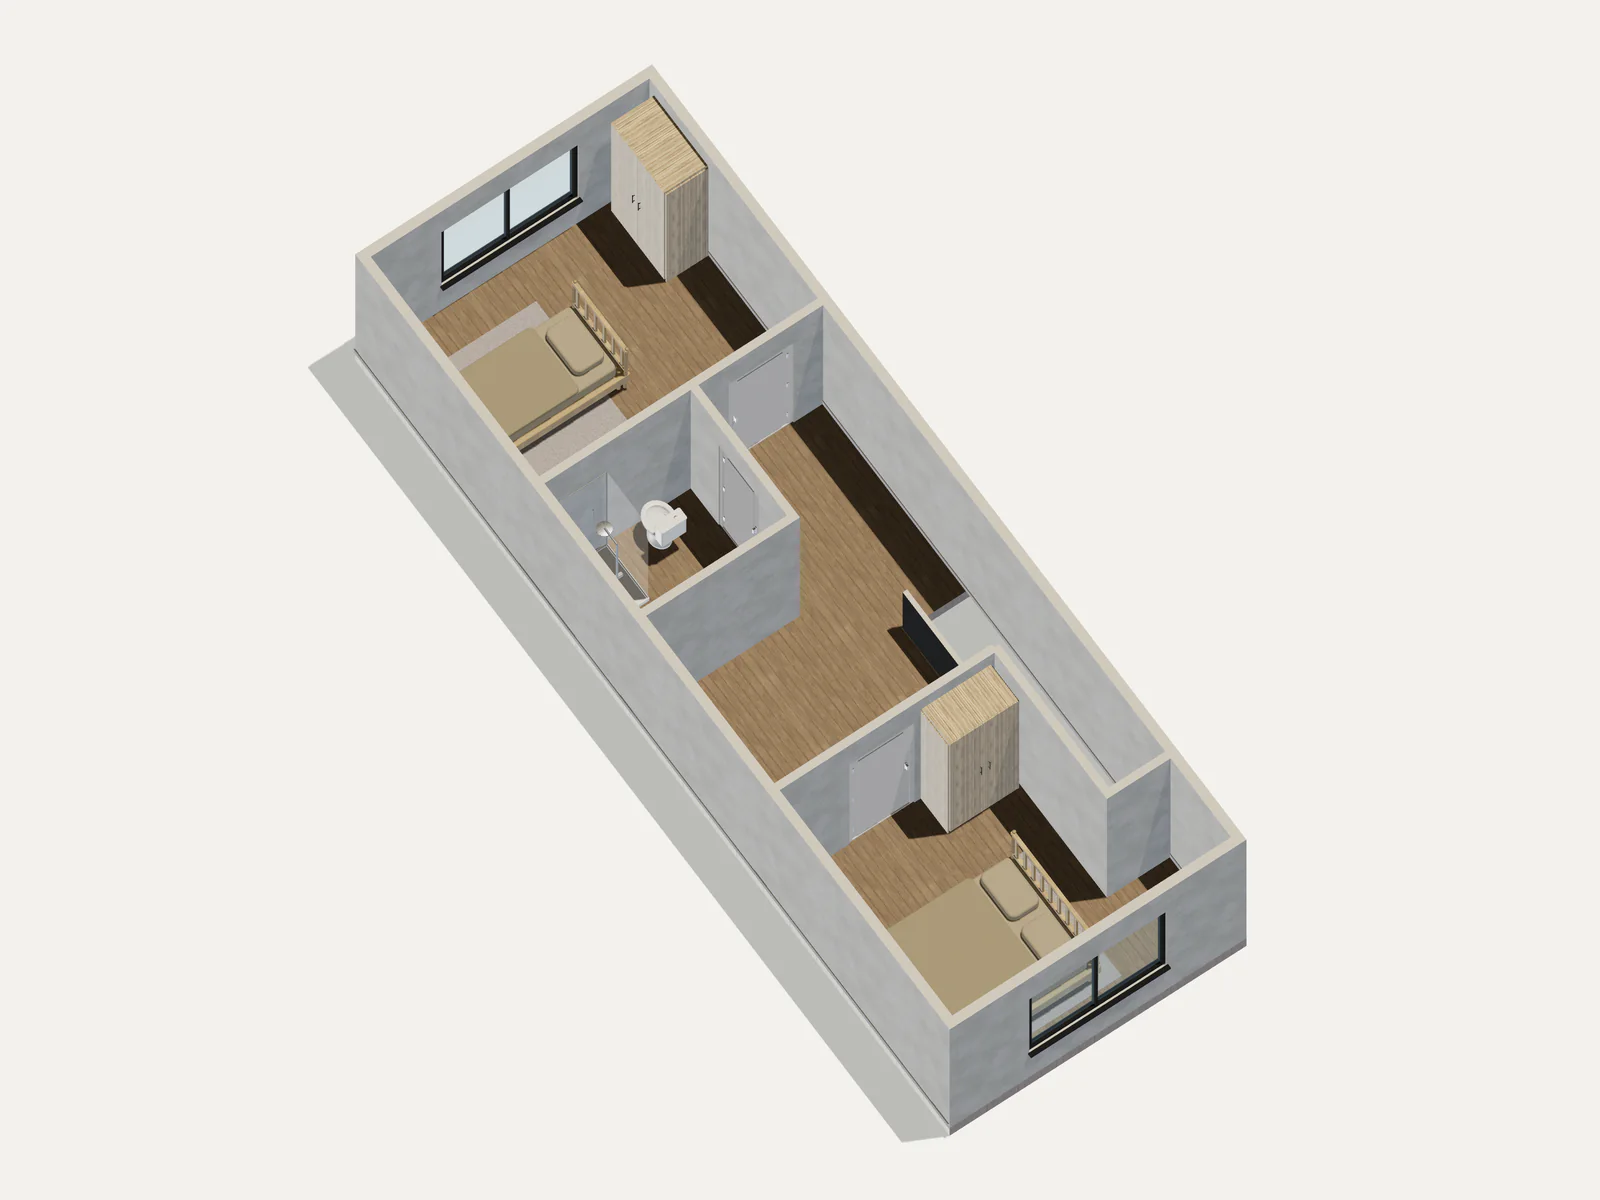
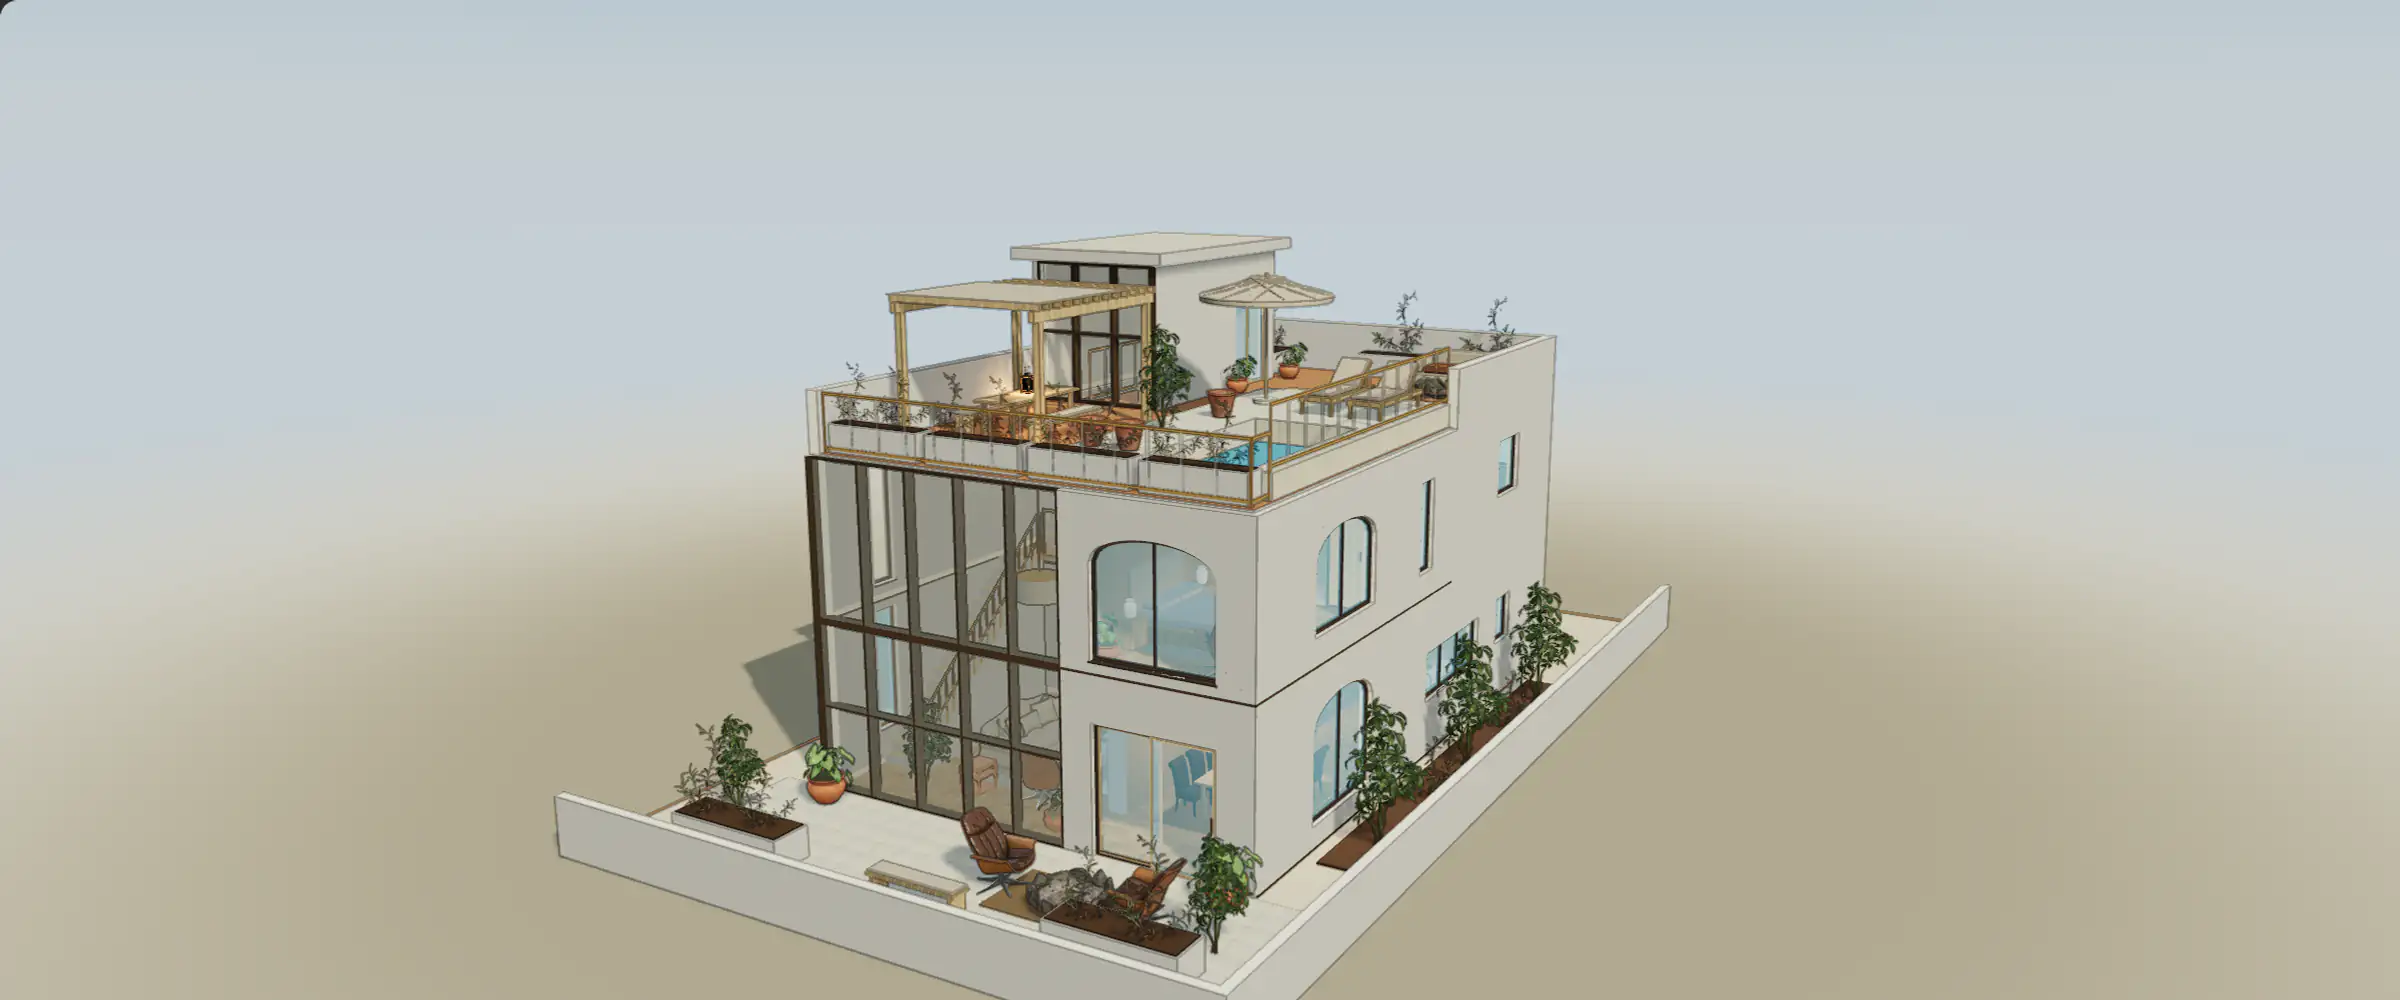
The final model has two levels. The ground floor holds the living, dining and kitchen space with the island, the wall counter, the open stair and the glazed terrace access. The upper floor has two bedrooms and a bathroom. The whole model is about 5.4 m tall, with the upper floor at about 2.8 m.
The published project summary calls it what it is: a conceptual, editable model built for planning. You can open Casa René on its public page to walk through it, or download the refined model as GLB.
What you can do next
Once a drawing is a model, these are the things you can do with it, and what each one needs:
- Inspect it in 3D. If your account qualifies, your first one-floor build is free to view in 3D.
- Edit it. Moving walls, doors, windows, furniture and finishes needs a floor: $4.99 for one, $8.99 for two or $19.99 for five, paid once. The openings guide and the furniture guide cover the edits this project needed.
- Compare design options, for example two kitchen layouts, without losing the first one.
- Share a view and collect comments from the people you are planning with.
- Export it. Floor packs export SVG, PDF, GLB, glTF, OBJ, DAE, STL, 3MF, USDZ, JSON, CSV, XLSX and PNG, JPEG or WebP images. DXF, DWG, SKP, IFC, STEP and export controls need Pro ($29.99/month) or Studio ($69.99/month). The export guide explains each format.
- Make photoreal AI images of a room. These use credits; see pricing.
Preparing your own drawing
A hand sketch can work. These habits make the first pass read more of it:
- Draw one floor per page. If the home has two floors, draw two pages and prepare them as separate levels.
- Write the overall width and depth, and the key spans: the stair run, a passage, a kitchen counter. The numbers matter more than drawing to scale. This sketch was 2.5 times too short, and the model still came out the right size because its numbers were written down.
- Label every door and window, and draw each one as a gap in the wall.
- Keep notes and arrows outside the outline. An arrow pointing at an appliance can be read as an opening.
- Photograph the page square-on, in good, even light, with the whole page in frame.
- Upload JPEG, PNG, PDF, SVG or DXF, up to 25 MiB. Convert HEIC photos to JPEG or PNG first.
Is the result exact?
The measurements you write down are kept. Everything else is read from the drawing or estimated, and heights are always estimated unless you supply them. What “measured” means explains the difference.
Do I need to draw the upper floor?
If you want an upper floor you can rely on, yes. Without a drawing, an upper floor can only be inferred, as it was here, and it will not reflect your real rooms.
What if my sketch has no dimensions?
The model can still be built, but its scale is a guess, and the drawn proportions are rarely right. Measure one long wall and write it on the sketch before you photograph it, then check the model against a second dimension.
Can I import a CAD model instead?
Yes. DXF drawings go through the same uploader, and IFC, SketchUp, GLB and other models can be opened inside a project. See importing drawings and 3D models.
Upload your floor plan to see your first pass in 3D, or try a sample first, with no account.