INK TO BRICK vs Rendair: floor-plan renders and masked image edits
Rendair documents generating an image that looks like a 3D floor plan, then refining the image. Compare this visual-production workflow with changing inspectable architecture in an ongoing INK TO BRICK project.[1][7]
Where each one fits
Choose INK TO BRICK if
Continue from a supplied drawing or supported model, inspect spatial views and correct native elements or imported objects in an ongoing project.[4][5]
Choose Rendair if
Prompt-directed architectural renders and image-region revisions.[1]
Task by task
See the editing workflow
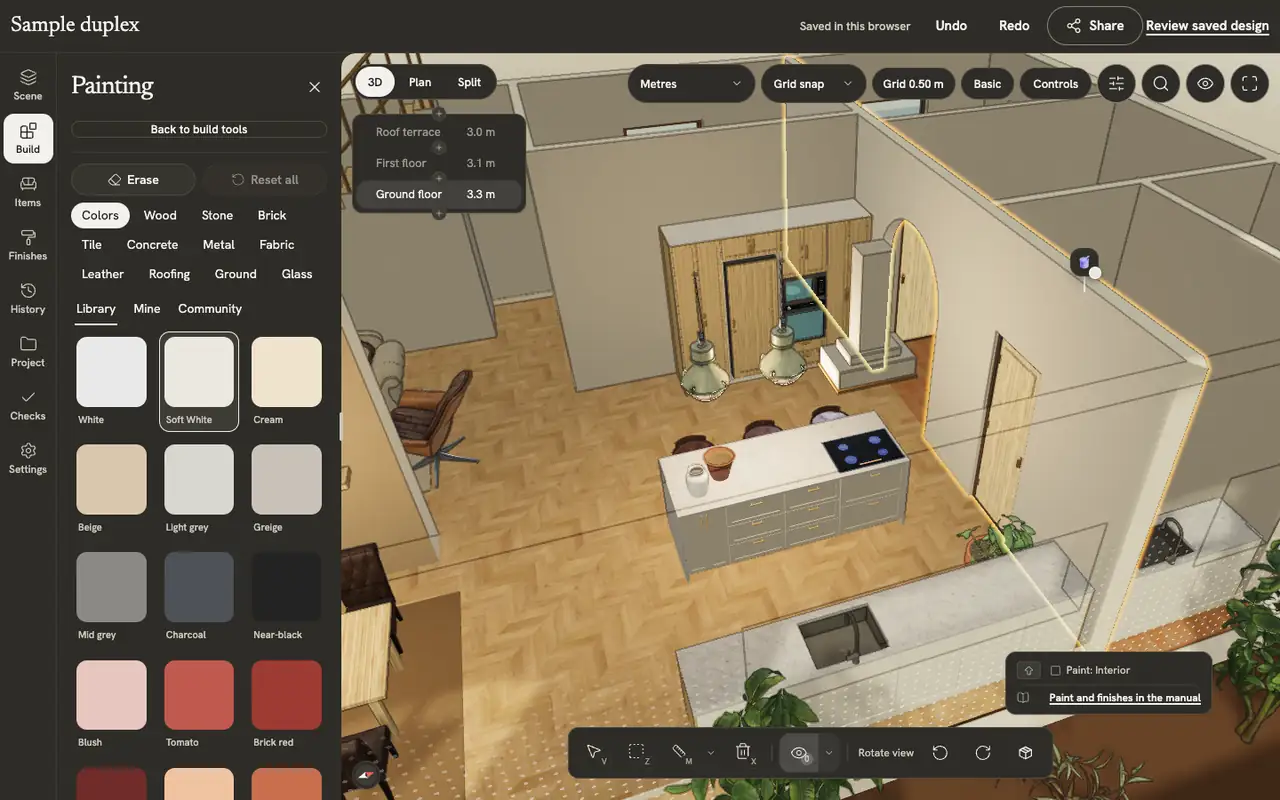
When the task is a styled image, keep appearance separate from the editable layout behind it. Here the editor identifies a particular wall surface and places a chair in the model, so you can see what is changed before choosing a presentation view.
The demonstrations use native elements in the sample duplex authored in INK TO BRICK.
Paint and finishes
Paint walls, floors and furniture from the material library, make your own materials, and apply catalog finishes to a room or the whole home.
Placing and arranging
Place, turn, select, move, copy and delete pieces, and build kitchen runs and shelves along a wall.

A mask constrains an image operation
Mask a finish region and compare the entire before/after image, especially nearby openings. Accept the visual change only after inspecting what remained outside the requested area. That check is different from selecting a wall object and changing its property.
Multiple viewpoints need consistency checks
Generate the views needed for your presentation and compare room count, openings and furniture positions. A prompt can request a camera angle without establishing a shared underlying scene. INK TO BRICK is relevant when the camera must inspect the same editable project.[4][5]
A documented image route
Shortlist Rendair for architectural image production and regional visual revisions. Its official FAQ clarifies the 3D-looking image workflow; we did not generate or download a result. The main English tool URL was restricted during this review, so the FAQ is the evidence used here.[1][2]
Sources and scope
The cited vendor pages support the capability comparison. Any direct demo observation is identified in the article; this is not a matched-source accuracy benchmark. Product details can change. Unavailable sources are identified, and older claims are not treated as current limitations. Check the linked plan, price and export details.